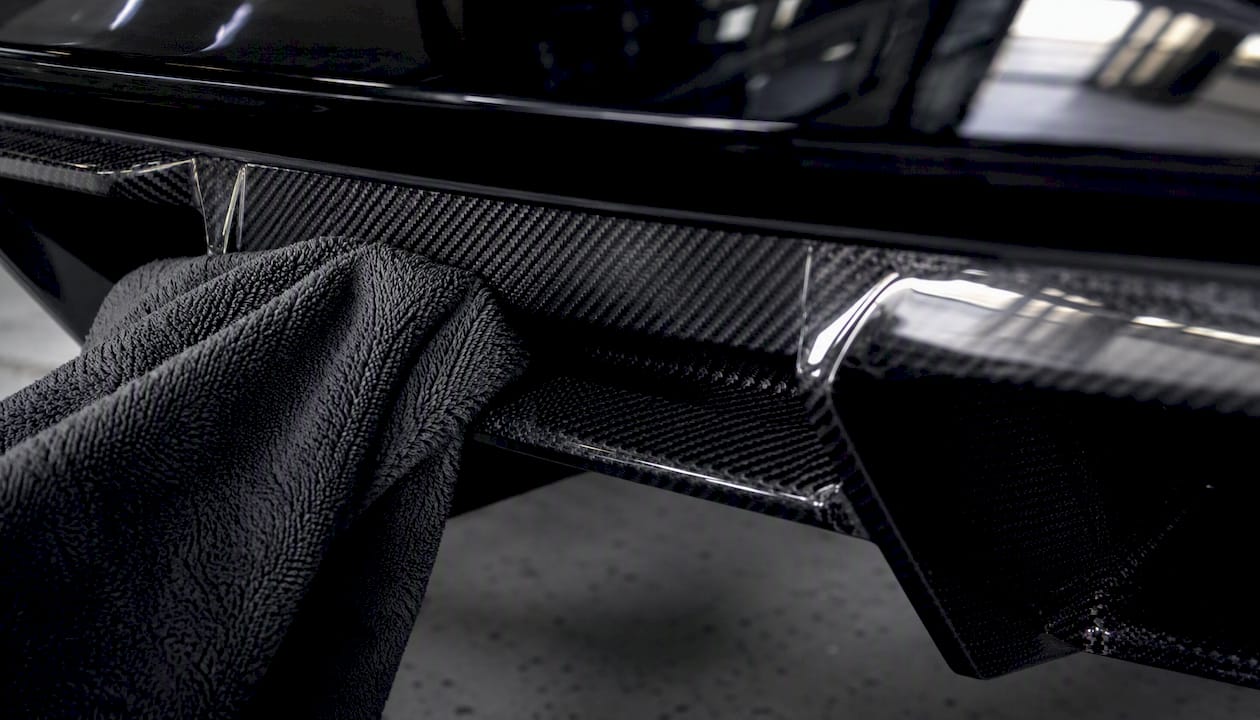
The safest carbon fiber care routine is simple: rinse off loose grit, wash with a pH-neutral shampoo and a soft microfiber mitt, dry with a plush microfiber towel using straight-line motions, then apply a protective layer to guard against UV and chemical damage. Do that on a consistent cadence and you will keep a clear-coated hood, splitter, or diffuser looking showroom fresh for years.
Here’s what to do in the next five minutes if you’re staring at a dusty splitter or a bug-splattered hood right now:
- Grab a soft microfiber towel and knock off loose dust and grit before any liquid touches the surface.
- Mix a pH-neutral auto shampoo with water and use a clean, soft microfiber or foam mitt, never a sponge that’s touched other panels.
- Wipe in straight lines, following the weave direction, not circles.
- Once dry, note whether the piece has a UV protectant or ceramic coating on it. If it doesn’t, that’s your next move.
Pro Tip: Never wash a carbon fiber panel in direct sunlight or when the surface is hot to the touch. Heat flash-dries soap and water into mineral spots that etch into the clear coat before you can rinse them off.
The visible shine on a carbon fiber hood or diffuser isn’t the fiber itself. It’s a clear coat or resin overlay, and that thin layer is what actually takes the abuse. Treat the coating gently, and the fiber underneath stays protected for the life of the part.
Skip degreasers, acetone, dish soap, or anything labeled “heavy-duty.” Those solvents strip UV inhibitors out of the clear coat faster than sun exposure ever will, and once that layer starts to haze or yellow, no amount of polishing brings it back to factory condition.
Key Takeaways
Carbon fiber durability depends on gentle, finish-matched cleaning combined with a consistent UV protection schedule, and no maintenance routine can compensate for poor manufacturing quality.
| Point | Details |
|---|---|
| Wash gently, weekly to biweekly | Use pH-neutral shampoo, soft microfiber, and straight-line wipes on a regular cadence. |
| Match protection to finish | Gloss tolerates wax and ceramic; matte needs matte-safe coatings only. |
| Test-spot every new product | Apply on a hidden area first to catch discoloration or reaction before full use. |
| Know your repair triggers | Fingernail-catching scratches or edge lifting mean professional inspection, not DIY polish. |
| Manufacturing sets the ceiling | Autoclave-cured, UV-stabilized parts respond better to coatings and last longer overall. |
Table of Contents
- Step-by-Step Carbon Fiber Cleaning Routine
- What Protection Should You Use: Wax, Sealant, or Ceramic Coating?
- Do Gloss, Matte, and Raw Carbon Need Different Care?
- Which Tools Are Safe for Carbon Fiber Surfaces?
- How Do You Fix Bug Splatter, Water Spots, and Scratches?
- How Often Should You Clean and Protect Carbon Fiber?
- Why Manufacturing Quality Determines Your Maintenance Ceiling
- Pre-Cleaning Checklist: Avoid Warranty and Safety Mistakes
- An Engineer’s Take on Carbon Fiber Upkeep
- Sources
- FAQ
Step-by-Step Carbon Fiber Cleaning Routine
Carbon fiber maintenance isn’t complicated, but it rewards patience over speed. Rushing the wipe-down is the single fastest way to put fine swirl marks into an otherwise flawless clear coat.
1. Prep the surface. Use a compressed air blower or a soft, dry microfiber to knock off loose dust, leaves, and grit. If you’re unsure how a product or towel will react, test it on a hidden area first like the underside of a splitter lip.
2. Rinse before you touch it. If the panel is heavily soiled with road film or track dust, a low-pressure rinse loosens abrasive particles before contact. Skip this step on lightly dusted daily-driver panels; a direct wash is fine.
3. Wash with the right chemistry. Load a pH-neutral shampoo onto a soft microfiber wash mitt or foam applicator. Work in straight, overlapping lines that follow the carbon weave pattern rather than circular scrubbing, which is where most swirl damage originates.
4. Turn your towel often. Flip and refold your wash mitt or towel every panel section so you’re never dragging trapped grit back across the surface.
5. Rinse and dry. A final rinse with distilled water avoids the mineral spotting that hard tap water leaves behind, especially in areas with heavy well-water calcium content. Blot dry with a plush microfiber towel, and use a smaller detailing towel or soft brush to get into vents, gill inlets, and diffuser channels where water pools.
Basic kit for this routine: a pH-neutral car shampoo, two or three soft microfiber towels (one for drying, one for glass, one dedicated to carbon only), a plush drying towel, and a soft-bristle detail brush for crevices.
Pro Tip: Keep a towel set that touches nothing but carbon fiber. Cross-contamination from a towel that’s wiped brake dust off a wheel is one of the most common causes of fine scratching on gloss panels.
What Protection Should You Use: Wax, Sealant, or Ceramic Coating?
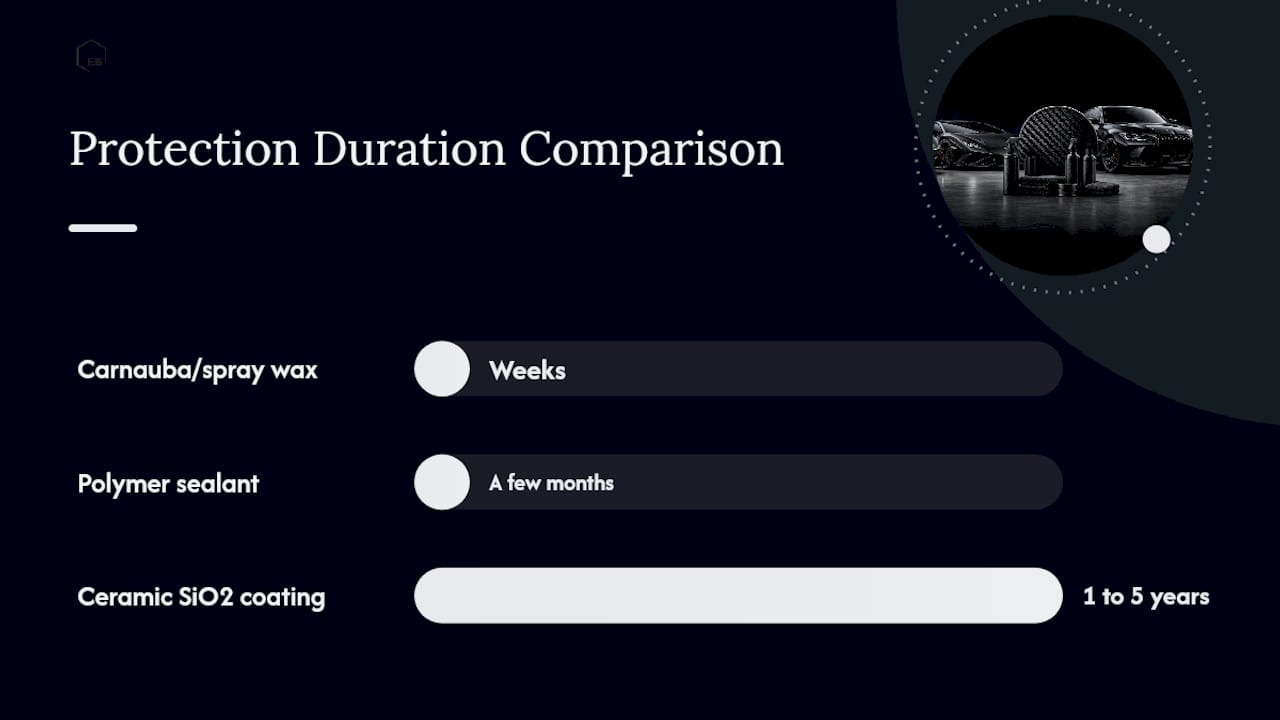
The right protective layer depends on how the car is used, not just what looks good on a shelf. Carnauba and spray waxes add short-term gloss and hydrophobic beading, but they wear off in a matter of weeks. Polymer sealants hold up longer, typically a few months, and resist chemical breakdown better than natural wax. Ceramic SiO2 coatings sit at the top of the durability curve, protecting for one to five years depending on the product and how well the surface was prepped beforehand.
| Protection Type | Typical Duration | Best For |
|---|---|---|
| Carnauba/spray wax | Weeks | Show cars needing a quick gloss boost before an event |
| Polymer sealant | A few months | Daily drivers wanting moderate, low-maintenance protection |
| Ceramic SiO2 coating | 1 to 5 years | Track cars and daily exotics facing constant UV and road exposure |
If your car sits outside daily and racks up highway miles, a ceramic coating earns its cost through reduced maintenance and stronger UV resistance. If you’re prepping a show piece for one weekend, a quality spray wax gets the job done without the prep time.
Before applying anything more permanent than a spray wax, run through this checklist:
- Fully decontaminate the panel, removing embedded brake dust, tar, and bonded contaminants with a dedicated clay bar or iron remover safe for clear coats.
- Polish out any existing swirls or haze, since a coating locks in whatever condition the surface is in when applied.
- Wipe the panel down with an isopropyl alcohol solution to strip oils before the coating goes on.
- Apply in a shaded, temperature-controlled space and follow the product’s specific cure time before the first wash.
A properly prepped ceramic layer resists chemical etching and UV breakdown far better than a coating rushed onto a surface with existing swirl marks or old wax residue.
Do Gloss, Matte, and Raw Carbon Need Different Care?
Finish type changes almost everything about your maintenance approach, and this is where most DIY mistakes happen. Gloss carbon shows every swirl and hologram under direct light, which is exactly why straight-line wiping technique matters more here than on any other automotive finish. A single pass with a dirty towel in a circular motion can leave marks visible from ten feet away in sunlight.
Matte and satin finishes play by a different rulebook entirely. Standard waxes and glossy sealants add sheen that permanently alters the intended flat appearance, and once that happens, there’s no wiping it away; the product has to be stripped and the panel re-treated with a matte-specific formula. Look for ceramic coatings designed specifically for matte surfaces that add protection without adding shine.
Raw or minimally coated carbon fiber, the kind you’ll sometimes see on show-only builds or interior trim, is the most fragile of the three. It has little to no clear coat buffer, so it needs the mildest cleaner available and should never sit soaking in water or cleaning solution, since uncoated resin can absorb moisture over time.
| Finish Type | Key Rule | Never Use |
|---|---|---|
| Gloss clear coat | Straight-line wipes only, minimal pressure | Circular scrubbing, abrasive pads |
| Matte/satin | Matte-specific cleaners and coatings | Standard wax, glossy sealants |
| Raw/uncoated | Mildest cleaner, quick contact time | Soaking, strong solvents, prolonged wet exposure |
Which Tools Are Safe for Carbon Fiber Surfaces?
The right tools cost less than a single trip to a body shop for buffing out scratch damage, so it’s worth building a dedicated kit.
Safe to use: soft microfiber wash mitts and towels, plush drying towels, foam applicator pads, soft-bristle detail brushes for vents and seams, and a low-pressure rinse nozzle or watering can for gentle rinsing.
Avoid entirely: paper towels (they contain wood fibers that scratch clear coat at a microscopic level), any abrasive sponge or scouring pad, steel wool, and pressure washers held closer than a few feet from the surface, since high-pressure jets at close range can force water past seams and edge seals.
When shopping for products, look for labeling that specifically says “safe for clear coat” or “matte-safe.” A pH-neutral car shampoo formulated for ceramic-coated finishes is a solid baseline choice for both painted and carbon panels, since it won’t strip an existing coating during routine washes. Always test a new product on a small, hidden section first, like the inside edge of a diffuser fin, before committing to a full panel application.
Pro Tip: If a product label doesn’t specify whether it’s safe on clear-coated composite surfaces, assume it isn’t. Automotive paint chemistry and carbon fiber clear coat chemistry aren’t identical, even though they look similar on the shelf.
How Do You Fix Bug Splatter, Water Spots, and Scratches?
Contaminants happen fast on a car that actually gets driven, and how you respond in the first few days determines whether it’s a five-minute fix or a repair bill.
Bug splatter and tar should be soaked with a dedicated bug and tar remover, not scraped. Acids in bug residue etch clear coat within hours if left baked on in the sun, so treat it the same day you notice it.
Water spots usually lift with a dedicated water-spot remover, but test it on a hidden section first since some formulations are more aggressive than others. Distilled water for your regular rinse largely prevents this problem before it starts.
Light swirl marks can sometimes be improved with a finishing polish and a dual-action polisher on a low-cut pad, but factory clear coats on carbon fiber parts are thin, thinner than most automotive paint. If a scratch catches your fingernail when you drag it across, polishing alone won’t fix it.
Here’s the decision framework for DIY versus professional repair:
- Surface haze or light swirling that doesn’t catch a fingernail: safe to attempt polishing at home.
- Deeper scratches that catch a fingernail or expose fiber texture: stop and consult a repair specialist.
- Peeling, bubbling, or lifting clear coat at panel edges: this signals delamination and needs professional inspection before any further cleaning.
- Visible weave distortion, cracking, or a panel that flexes differently than it used to: structural concern, not a cosmetic one.
A scratch you can polish out is a maintenance issue. A scratch that catches your fingernail, or clear coat that’s starting to lift at an edge, is a repair issue. Confusing the two usually makes the damage worse and more expensive to fix.
How Often Should You Clean and Protect Carbon Fiber?
Exposure drives frequency more than anything else. A garage-kept show car and a daily-driven Mercedes-AMG splitter that sees highway grime and road salt need entirely different schedules.
| Use Case | Wash Frequency | Protection Reapplication |
|---|---|---|
| Daily driver | Every 1 to 2 weeks | Sealant every 3 to 4 months, or ceramic annually |
| Show/weekend car | Before and after each event | Spray wax as needed, ceramic every 1 to 2 years |
| Track car | After every session | Sealant monthly during active season, ceramic pre-season |
Run a quick inspection monthly (or after every track day) for early haze, hairline cracking near mounting points, and edge lifting where panels meet trim or bumper components. Salt exposure and constant UV load, common on track cars and daily exotics alike, accelerate the clear coat breakdown that UV protection is specifically designed to slow. Screenshot the table above and adjust the numbers up if your car sees coastal salt air or extended track exposure.
Why Manufacturing Quality Determines Your Maintenance Ceiling
Not every carbon fiber part responds to care the same way, and that comes down to how it was built long before it ever reached your garage. Resin chemistry and cure method set the baseline for how well a part resists UV breakdown and edge delamination over its lifetime. Parts cured through autoclave processes, under controlled heat and pressure, bond the resin and overlay far more consistently than wet lay-up methods produce, which directly affects how well a clear coat holds up to years of washing and sun exposure.
- Autoclave-cured 2×2 twill panels have tighter resin distribution than hand-laid alternatives, which reduces the microscopic voids where moisture and contaminants collect over time.
- UV-stabilized resin formulations resist the yellowing that plagues budget carbon fiber parts within a season or two of sun exposure.
- Proper overlay bonding during the finishing workflow determines whether a ceramic coating actually adheres long-term or starts lifting at the edges within months.
This is why maintenance alone can’t rescue a poorly manufactured part. You can wash and coat a budget hood every week and still watch it yellow and crack at the seams within two years, because the manufacturing process failed before the part ever left the factory. Always test-spot new products, follow finish-specific prep steps, and defer to manufacturer instructions when a part comes with specific care documentation.
Care routines can slow degradation, but they can’t fix a bonding problem baked in at the manufacturing stage. If a part is yellowing or delaminating within a year despite proper care, that’s a materials and process issue, not a washing technique issue.
Pre-Cleaning Checklist: Avoid Warranty and Safety Mistakes
Before you touch a panel with a coating or sealant, run through this short list. It takes five minutes and prevents most of the expensive mistakes owners make on new installs.
- Photograph the panel before you start, including close-up shots of any existing chips, hazing, or edge condition, so you have a reference point if something changes.
- Test any new chemical on a small hidden section and wait a few minutes to check for discoloration or reaction.
- Check the manufacturer’s specific care documentation for banned chemicals or treatments that void coverage.
- Confirm the panel is fully secured before cleaning, especially aero pieces like splitters and diffusers, since applying pressure to an unsupported edge can stress mounting points.
- Stop immediately if you see peeling clear coat or lifting at panel edges. Cleaning over active delamination pushes moisture further under the surface and makes professional repair more difficult.
- Never apply a coating over a surface with unresolved swirls or contamination; it locks in the defect.
- Never use a pressure washer within a few feet of seams, vents, or mounting hardware.
- Never skip the test-spot step, even with a product you’ve used before on a different finish.
An Engineer’s Take on Carbon Fiber Upkeep
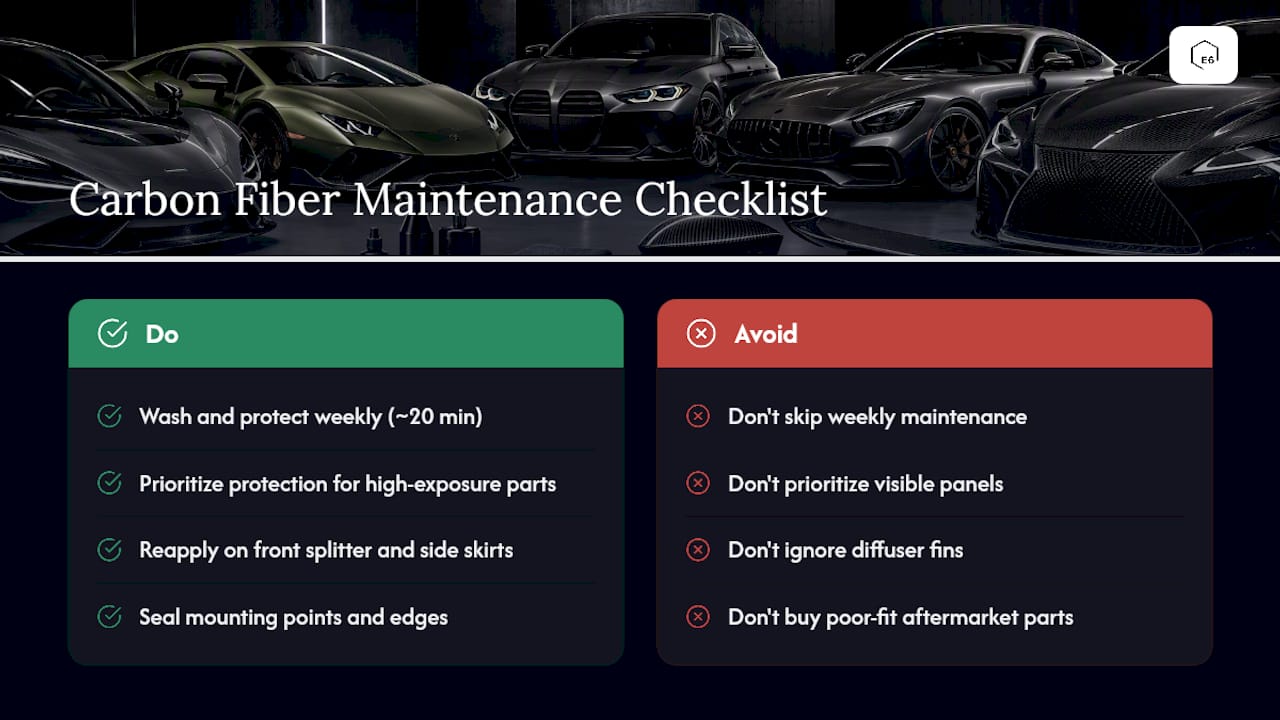
Maintenance discipline is the cheapest insurance you can buy for a carbon fiber aero package. A consistent wash and protection cadence costs a few dollars in supplies and twenty minutes a week. Skipping it costs you a full repair or replacement further down the line, and on a high-value platform, that difference is significant.
The panels that take the most abuse are the ones owners forget about: rocker extensions, front lip edges, and diffuser fins that catch road debris, curb strikes, and constant airflow at speed. On a Lexus LC500 build, the front splitter and side skirt edges see the highest exposure and deserve protection reapplication ahead of the rest of the panel set. On McLaren and Lamborghini platforms running deeper aero packages, mounting point clearances and edge sealing matter as much as the visible finish, since fitment tolerance affects how well a coating holds at high-stress contact points.
Prioritize your protection budget where the exposure is highest, not where the panel is most visible. A hood looks great in photos, but it’s the leading edges and underbody-adjacent pieces doing the real work, and they’re usually the first to show wear if neglected.
Owners looking to upgrade beyond factory carbon components, particularly on Mercedes-AMG, Lexus, and exotic platforms, benefit from understanding why premium carbon fiber construction costs more before investing in aftermarket aero. The maintenance routine only performs as well as the part it’s protecting, and E6 Carbon builds every component with a finishing process designed to give that maintenance ceiling room to work. Explore the full carbon fiber component catalog to see how fitment-first engineering changes the long-term care equation.
Sources
- Carbon Fiber Cleaning Guide: Safe Steps & Tips
- Carbon Fiber Maintenance Guide: How to Care for Carbon Fiber Products
- High Gloss Carbon Fiber Care 101: Quick Tips
- Caring for Carbon Fiber Car Parts: Cleaning & Maintenance
FAQ
What ruins carbon fiber?
Harsh solvents, abrasive pads, high-pressure washing at close range, and prolonged UV exposure without protection are the main causes of clear coat failure, yellowing, and surface scratching.
Does spray wax protect carbon fiber from fading?
A carbon-fiber-rated spray wax adds temporary UV resistance and hydrophobic protection, but it only lasts a few weeks, so it works best as a touch-up between longer-lasting sealant or ceramic applications.
How do you make carbon fiber look new again?
Start with a thorough decontamination and gentle polish to remove existing haze or swirls, then apply a fresh protective layer, ceramic coating for the longest-lasting results, matched to the panel’s specific finish.
Can you put wax on carbon fiber?
Yes, on gloss and clear-coated finishes wax is safe and adds shine plus short-term protection, but never use standard wax on matte or satin carbon fiber since it adds unwanted gloss that’s difficult to remove.