
Upgrading to forged wheels can shave up to 3 seconds off your lap times while transforming your vehicle’s handling dynamics. Yet choosing the right performance wheels involves navigating complex technical specifications like offset tolerances, load ratings, and material properties that directly impact both safety and track performance. This guide simplifies the entire process from material selection through professional installation techniques, helping you avoid costly mistakes while achieving measurable gains in acceleration, braking, and cornering grip for your luxury or sports vehicle.
Table of Contents
Prerequisites And Tools Needed For Upgrading Performance Wheels
Customization Options And Their Impact On Aesthetics And Performance
Expected Timelines, Costs, And Professional Service Insights
Key Takeaways
| Point | Details |
| Weight Reduction Impact | Forged wheels reduce weight by up to 30%, directly improving acceleration and handling response. |
| Fitment Precision | Correct offset within ±5mm and proper load ratings prevent handling issues and component damage. |
| Installation Quality | Professional torquing to 80-120 Nm spec plus balancing prevents vibration and premature wear. |
| Customization Balance | Custom finishes enhance aesthetics but require maintenance to avoid 30% lifespan reduction. |
| Time Investment | Professional installation with alignment and balancing typically requires 2-4 hours total. |
Prerequisites and Tools Needed for Upgrading Performance Wheels
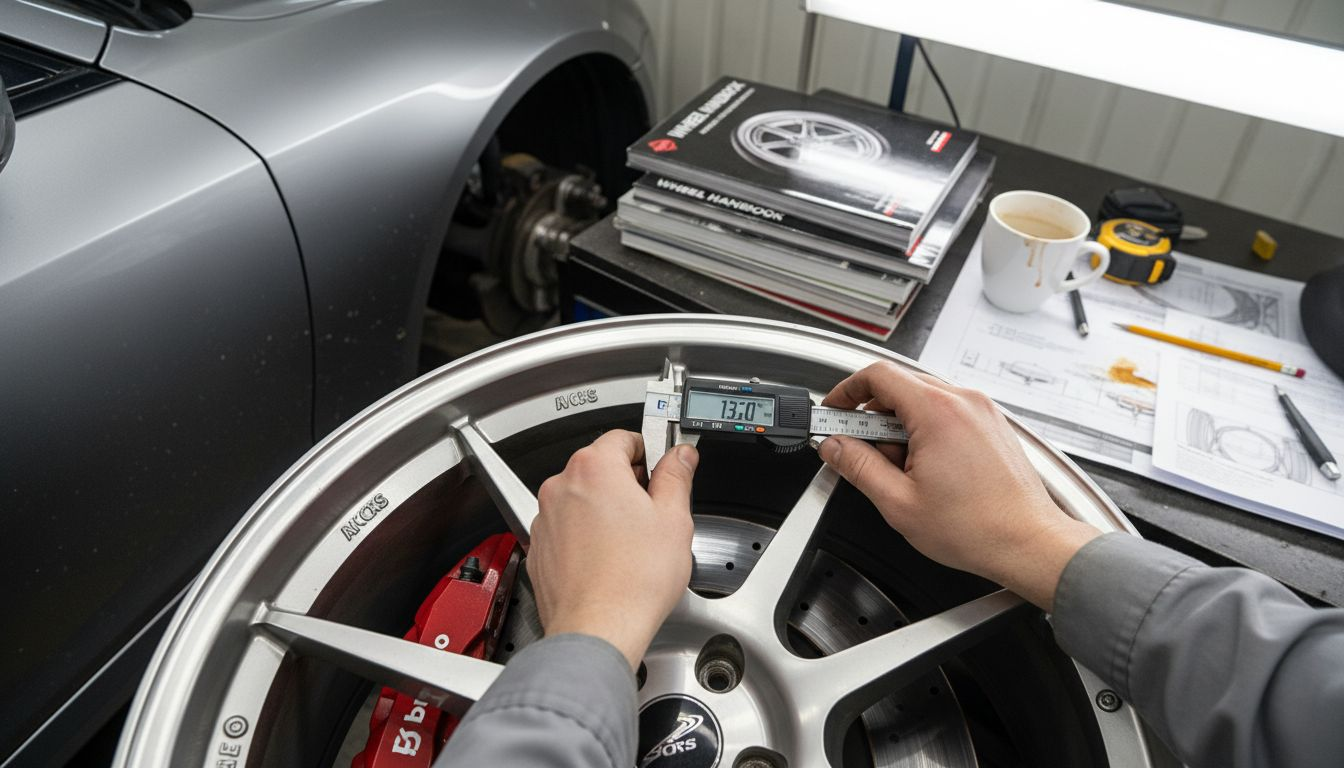
Before touching your vehicle, gather the essential equipment that separates successful upgrades from dangerous failures. A calibrated torque wrench is non-negotiable for achieving manufacturer-specified lug nut tension, while quality jack stands rated above your vehicle’s weight provide the safety margin that prevents catastrophic accidents. Your toolkit must include an impact wrench for efficient removal, wheel chocks to prevent rolling, and a breaker bar for stubborn fasteners.
Understanding your vehicle’s exact specifications prevents expensive fitment errors. Record your bolt pattern, offset range, center bore diameter, and load rating from the owner’s manual or manufacturer documentation before purchasing wheels. These measurements determine compatibility and safety margins that affect everything from brake clearance to suspension geometry. Installing wheels without proper tools increases time by 50% and risk of error, turning a straightforward upgrade into a frustrating ordeal.
Your workspace setup directly impacts both safety and efficiency. Choose a level concrete surface away from traffic, with adequate lighting for inspecting mounting surfaces and hardware. Position your jack stands on the vehicle’s designated lift points to prevent frame damage. Organize tools within arm’s reach and lay out new wheels to verify they match your specifications before starting removal.
Pro Tip: Always perform a dry-fit test by sliding the new wheel onto one hub before removing all stock wheels. This confirms bolt pattern compatibility and identifies clearance issues with brake calipers or suspension components before you’re committed to the installation.
Torque wrench calibrated to 80-120 Nm range
Heavy-duty jack stands rated for your vehicle weight
Impact wrench with appropriate socket sizes
Wheel chocks and breaker bar for stubborn bolts
Clean workspace with proper lighting
Vehicle specification sheet with exact fitment data
Material Choice: Forged Wheels vs Cast vs Carbon Fiber
Material selection fundamentally determines your wheel’s performance characteristics, durability under stress, and maintenance requirements over time. Forged wheels offer up to 20-30% weight reduction compared to cast wheels, translating directly into reduced unsprung mass that improves suspension response and acceleration. The forging process compresses aluminum alloy under extreme pressure, creating a denser grain structure that resists impact damage and fatigue cracking far better than casting methods.
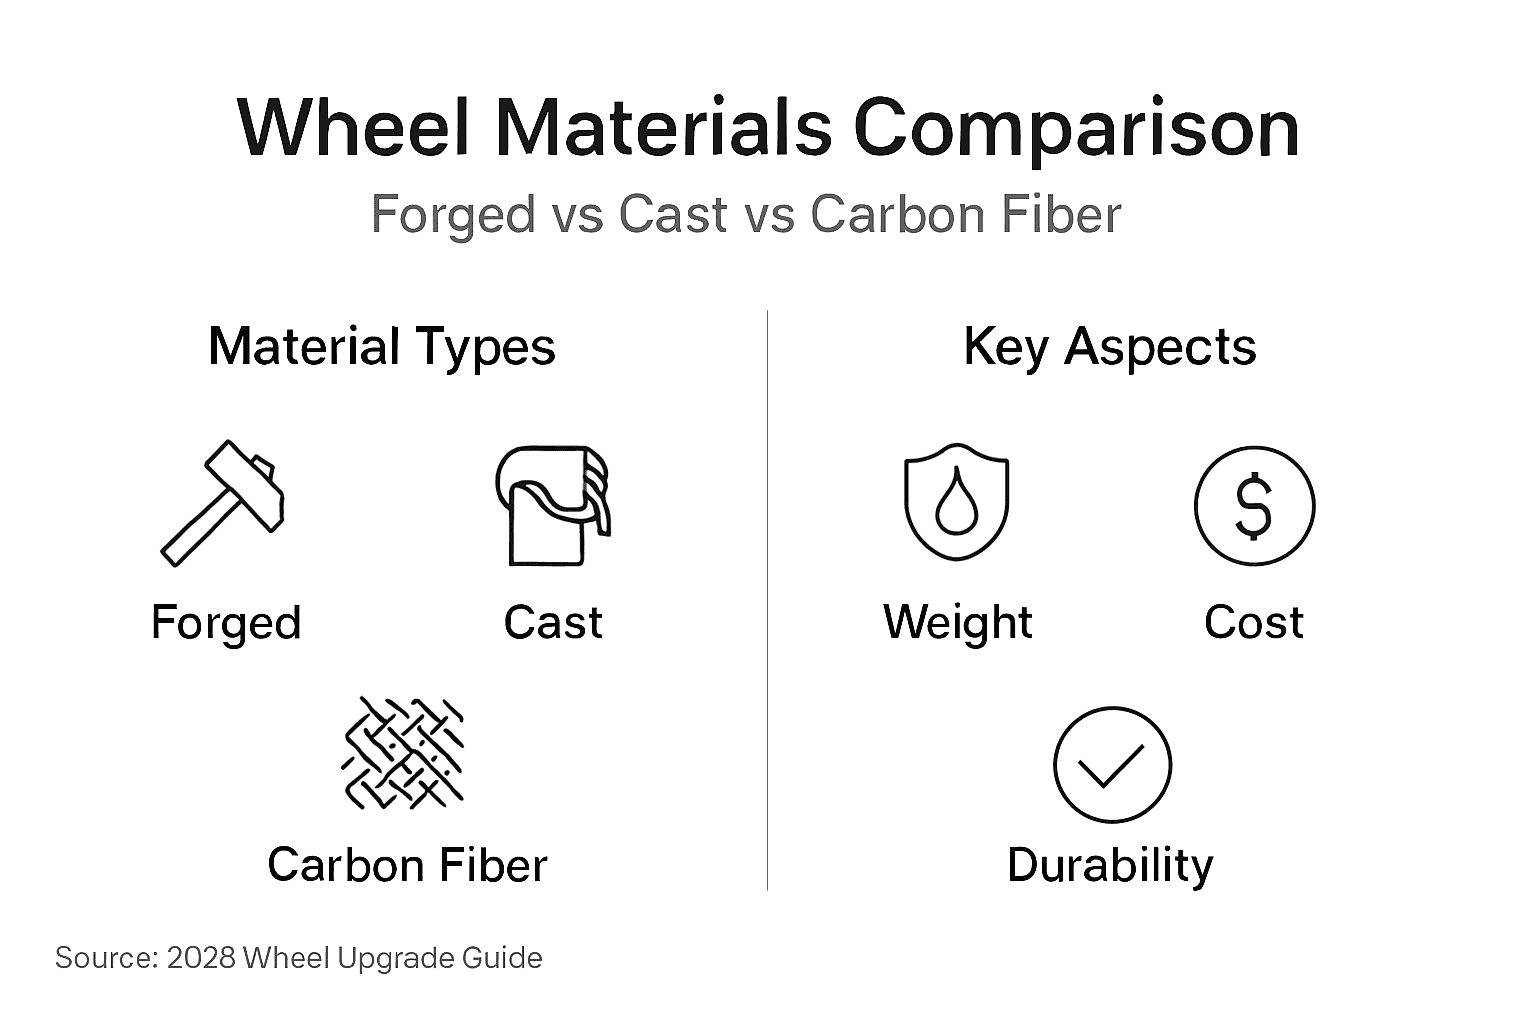
Carbon fiber wheels represent the ultimate weight-saving solution, cutting mass by up to 50% compared to forged aluminum. This dramatic reduction delivers measurable improvements in steering response and braking performance, particularly noticeable during track sessions where reduced rotational inertia means quicker direction changes. However, carbon fiber demands specialized installation procedures and careful inspection protocols to prevent delamination from improper torque application or impact damage.
Cast wheels remain the budget-conscious choice, manufactured by pouring molten aluminum into molds that create the wheel shape. While significantly less expensive than forged or carbon options, cast construction produces a less uniform internal structure prone to microcracking under sustained stress. Track enthusiasts pushing their vehicles to limit handling conditions should avoid cast wheels due to their reduced safety margins and higher failure rates during aggressive cornering or hard braking events.
Pro Tip: Consider your driving environment when selecting wheel materials. Daily driven vehicles benefit most from forged wheels that balance weight savings with durability, while dedicated track cars justify carbon fiber’s premium cost through measurable lap time improvements.
| Material | Weight vs Cast | Durability | Cost | Best Application |
| Cast Aluminum | Baseline | Moderate | Low | Street only, budget builds |
| Forged Aluminum | 20-30% lighter | High | Medium-High | Street and track, optimal balance |
| Carbon Fiber | 40-50% lighter | Very High (with care) | Very High | Dedicated track, ultimate performance |
Custom finishes like powder coating or machined faces complement your material choice by protecting against corrosion while enhancing visual appeal. Browse carbon fiber performance parts and carbon fiber aesthetics to coordinate your wheel upgrade with complementary body enhancements. Neglecting finish maintenance accelerates degradation, so factor ongoing care into your decision. Learn more about forged wheel performance benefits to understand the engineering advantages. Additional carbon fiber components complete a cohesive performance aesthetic.
Wheel Fitment and Sizing for Luxury and Sports Vehicles
Precise fitment specifications separate safe, high-performing upgrades from dangerous installations that damage suspension components or cause catastrophic failures. Your wheel’s bolt pattern must match your vehicle’s hub exactly, typically expressed as a number of bolts and diameter measurement like 5×120 for many BMW models. Even a single millimeter deviation prevents proper seating and creates dangerous stress concentrations during cornering loads.
Offset measurement determines how far your wheel sits inboard or outboard relative to the mounting surface. Incorrect offset selection causes tire rubbing around 35% of the time in DIY installations, leading to tire sidewall damage, fender contact, and unpredictable handling characteristics. Maintaining offset within ±5mm of OEM specifications preserves proper suspension geometry and steering feedback while preventing clearance issues with brake calipers or body panels.
Center bore diameter ensures your wheel centers properly on the hub, transferring loads through the hub rather than relying solely on lug nuts. Wheels with larger center bores than your hub require hub-centric rings to fill the gap and maintain proper centering. Load rating indicates the maximum weight each wheel can safely support, and must meet or exceed your vehicle’s requirements to prevent catastrophic failure during high-speed driving or emergency maneuvers.
Exact bolt pattern, offset, and load rating are critical dimensions for fitment, forming the foundation of safe wheel selection. Visual inspection after initial installation confirms no contact between tires and fender liners during full steering lock. Test drives at varying speeds reveal vibrations or handling changes that indicate fitment problems requiring immediate correction.
| Dimension | Tolerance | Consequence of Error | Verification Method |
| Bolt Pattern | Exact match only | Improper seating, failure risk | Physical test fit on hub |
| Offset | ±5mm maximum | Rubbing, handling issues | Measure from mounting pad to centerline |
| Center Bore | Exact or larger (with rings) | Vibration, improper centering | Caliper measurement vs hub diameter |
| Load Rating | Meet or exceed OEM | Wheel failure under load | Check manufacturer specification |
Verify bolt pattern matches vehicle hub exactly
Confirm offset stays within ±5mm of OEM specification
Measure center bore and obtain hub-centric rings if needed
Check load rating meets or exceeds vehicle requirements
Inspect brake caliper clearance at full steering lock
Test drive to confirm no rubbing or vibration issues
Explore luxury vehicle wheel fitment options engineered for precise compatibility. Additional resources on wheel fitment essentials and common offset mistakes provide deeper technical guidance.
Installation Best Practices and Safety Considerations
Proper installation technique determines whether your wheel upgrade delivers promised performance gains or creates dangerous failure points. Begin by verifying your workspace safety setup and confirming all tools are within reach before lifting the vehicle. Position jack stands on manufacturer-designated lift points to prevent frame damage, then remove stock wheels one corner at a time to maintain vehicle stability throughout the process.
Clean all mounting surfaces thoroughly with a wire brush to remove rust, brake dust, and debris that prevents wheels from seating flush against hubs. Any contamination between the wheel and hub creates microscopic gaps that allow movement under load, eventually loosening lug nuts and causing vibration. Inspect hub faces and wheel mounting surfaces for damage or corrosion that requires correction before installation proceeds.
Professional installation with alignment and balancing takes 2-4 hours typically, reflecting the careful attention required for proper execution. Hand-thread lug nuts initially to prevent cross-threading, then tighten in a star pattern to ensure even pressure distribution across all mounting points. Use your calibrated torque wrench to achieve the manufacturer-specified tension, typically between 80-120 Nm depending on your vehicle’s requirements.
Pro Tip: After driving 50-100 miles on new wheels, recheck all lug nut torque values. Initial seating and thermal cycling can cause slight loosening that requires retightening to maintain proper clamping force.
Verify workspace safety and position jack stands on designated lift points
Remove stock wheels and clean all hub mounting surfaces thoroughly
Inspect hubs and new wheels for damage or contamination
Hand-thread lug nuts in star pattern to prevent cross-threading
Torque lug nuts to manufacturer specification using calibrated wrench
Lower vehicle and perform wheel balancing at professional shop
Complete four-wheel alignment to restore proper suspension geometry
Test drive and verify no vibration or handling anomalies
Recheck torque after 50-100 miles of driving
Upgrade to performance forged wheels installation guide specifications for optimal results. Confirm professional wheel installation times align with your project schedule.
Troubleshooting and Common Mistakes in Wheel Upgrades
Recognizing and correcting installation errors prevents expensive damage to suspension components, brakes, and tires. Tire rubbing against fender liners during cornering or full suspension compression indicates offset or width problems requiring immediate correction. This contact damages tire sidewalls and creates unpredictable handling characteristics that compromise safety during emergency maneuvers.
Skipping wheel balancing causes vibrations in over 50% of cases, leading to premature tire wear and damage to suspension components from constant oscillation. Professional dynamic balancing corrects weight distribution around the wheel’s rotational axis, eliminating vibrations that become severe at highway speeds. Static balancing alone proves insufficient for modern high-performance applications where precision matters.
Using incorrect lug nuts or wheel studs increases failure risk by 40% because thread engagement and seat geometry must match wheel specifications exactly. Aftermarket wheels often require different lug nut styles than OEM equipment, with variations in seat angle, thread pitch, and shank length. Installing mismatched hardware creates stress concentrations that cause stud failure or wheel detachment during high-load conditions.
Rubbing noises during turns: Check offset and width against clearance specs, may require spacers or different offset
Steering wheel vibration: Balance all four wheels dynamically, inspect for bent wheels or damaged tires
Loose feeling in steering: Verify lug nuts torqued properly, check wheel bearings for play
Uneven tire wear: Perform four-wheel alignment immediately, verify load rating adequate
Brake pedal pulsation: Check for warped rotors from over-torqued lug nuts
Find solutions for correct wheel hardware and balancing tips matched to premium applications. Study common wheel upgrade errors to avoid these pitfalls entirely.
Expected Performance Outcomes and Realistic Benchmarks
Quantifying your wheel upgrade’s impact helps set realistic expectations and validates your investment in premium components. Forged wheels typically reduce lap times by 1-3 seconds on road courses through decreased rotational inertia that improves acceleration out of corners and reduces braking distances. This measurable improvement comes from lower unsprung mass that allows suspension to respond faster to road surface changes, maintaining tire contact during aggressive driving.
Handling precision improves noticeably as reduced wheel weight decreases the effort required to change direction. Steering inputs feel more immediate and progressive, giving you finer control over vehicle placement during corner entry and mid-corner adjustments. Braking performance gains manifest through shorter stopping distances and improved pedal feel, as lighter wheels require less force to decelerate their rotation.
Custom finishes enhance visual appeal dramatically but require consistent maintenance to preserve their appearance and protective properties. Neglected finishes can reduce lifespan by up to 30% as environmental contaminants penetrate protective coatings and accelerate corrosion. Budget time for regular cleaning with pH-neutral products and periodic inspection for chips or damage requiring touch-up.
Lap time improvements of 1-3 seconds on typical road courses
Noticeably sharper steering response and turn-in precision
Reduced braking distances by 5-10 feet from 60 mph
Elimination of wheel-related vibrations with proper balancing
Enhanced visual appeal from custom finishes and designs
More predictable handling at the limit of adhesion
Customization Options and Their Impact on Aesthetics and Performance
Personalizing your wheels through finish selection balances aesthetic preferences against practical durability requirements. Powder coating creates a durable, uniform finish resistant to chips and scratches, available in virtually any color to match your vehicle’s theme. This electrostatically applied coating bonds at the molecular level during curing, providing superior corrosion resistance compared to traditional paint.
Machined finishes expose the underlying metal through precision CNC cutting, creating distinctive patterns that catch light dramatically. These finishes require more frequent maintenance as exposed aluminum oxidizes when protective clear coats degrade. Carbon fiber overlays or accents add visual interest while contributing minor weight savings, though they demand careful cleaning to prevent damage to the composite material’s surface.
Neglected finishes can reduce lifespan by up to 30% as contaminants penetrate protective layers and accelerate material degradation. Establish a regular cleaning schedule using products specifically formulated for your wheel’s finish type. Avoid automatic car washes with harsh chemicals that strip protective coatings over time.
Pro Tip: Match your wheel finish to your local climate conditions. Coastal environments with salt exposure benefit from powder-coated or anodized finishes that resist corrosion, while dry climates permit more decorative machined or polished surfaces with reasonable maintenance intervals.
Powder coating: Maximum durability, unlimited color options, easiest maintenance
Machined finishes: High visual impact, requires frequent cleaning and sealing
Polished aluminum: Mirror-like appearance, demands weekly maintenance to prevent oxidation
Anodized coatings: Corrosion resistant, available in limited color range
Carbon fiber accents: Premium aesthetic, requires specialized cleaning products
Discover carbon fiber customization options that complement your wheel aesthetic perfectly.
Expected Timelines, Costs, and Professional Service Insights
Planning your wheel upgrade requires understanding both time commitments and financial investments across different execution approaches. Upgrading wheels professionally typically takes 2-4 hours including preparation and alignment, covering removal, installation, balancing, and post-installation geometry checks. This timeline assumes no complications like seized lug nuts or damaged hub threads requiring additional repair work.
DIY installations save labor costs but demand tool investments and mechanical knowledge that many enthusiasts underestimate. A complete tool set including quality torque wrench, jack stands, and impact wrench costs between $300-600 for reputable brands that ensure accuracy and safety. Factor this initial investment against labor savings of $200-400 per installation when calculating total project economics.
Post-installation services prove mandatory rather than optional for achieving promised performance benefits. Four-wheel alignment corrects suspension geometry altered by wheel weight distribution changes, preventing uneven tire wear and handling imbalances. Dynamic balancing eliminates vibrations that damage suspension components and create uncomfortable driving experiences at highway speeds.
| Approach | Time Required | Equipment Cost | Labor Cost | Total Investment |
| DIY | 3-5 hours plus learning | $300-600 tools | $0 labor | Wheels + tools |
| Professional | 2-4 hours | $0 tools | $200-400 | Wheels + labor |
| Track-Focused | 4-6 hours (includes testing) | $0-600 tools | $300-500 | Wheels + services + testing |
Wheel set cost varies from $2000-8000 depending on material and brand
Professional installation ranges $200-400 including mounting and balancing
Four-wheel alignment adds $100-200 to total project cost
DIY tool investment starts at $300 for quality equipment
Specialized hub-centric rings cost $50-100 per set
Custom finishes add 20-40% to base wheel price
Research professional wheel upgrade time and cost factors specific to your vehicle platform.
Explore Premium Performance Wheels at E6 Forged & E6 Carbon
Transforming your vehicle’s performance and aesthetics starts with selecting wheels engineered for demanding applications. E6 Forged delivers forged wheel solutions optimized for luxury and sports vehicles, combining weight reduction with structural integrity that withstands track conditions. Our AR01 Multipiece Forged Wheels offer modular construction for ultimate customization, while S10M Monoblock Forged Wheels provide maximum strength-to-weight ratios.

Complete your performance transformation with complementary aerodynamic enhancements like the Lexus LC500 Carbon Elite Kit, engineered to work synergistically with lightweight wheels for measurable downforce improvements. Our precision manufacturing processes ensure every component meets exacting tolerances for perfect fitment and lasting durability. Visit E6 Forged today to explore our complete range of performance upgrades designed for enthusiasts who demand excellence.
Frequently Asked Questions
What tools are absolutely necessary for a safe wheel upgrade?
A calibrated torque wrench, heavy-duty jack stands, impact wrench, and wheel chocks form the essential toolkit for safe installation. These tools ensure proper lug nut tension and vehicle stability throughout the process. Attempting upgrades without these items increases injury risk and installation time significantly.
How do I know if the wheel offset is correct for my vehicle?
Verify your vehicle’s OEM offset specification from the owner’s manual, then select wheels within ±5mm of that measurement. Consulting verified fitment databases or professional installers confirms compatibility before purchase. Test fitting one wheel before removing all stock wheels catches clearance problems early.
Can I install performance wheels myself, or should I hire a professional?
DIY installation works if you possess required tools and mechanical knowledge to follow torque specifications precisely. Professional shops provide alignment, balancing, and safety guarantees that DIY approaches cannot match. Most professional installations complete in 2-4 hours with proper equipment and expertise.
What kind of maintenance do custom wheel finishes require?
Custom finishes demand regular cleaning with pH-neutral, non-abrasive products formulated for automotive applications. Protection from road salt, brake dust, and environmental contaminants prevents premature degradation. Neglecting maintenance routines can shorten finish lifespan by up to 30% compared to properly cared wheels.


