TL;DR:
- The AMG GTS to GTR bumper conversion involves precise, model-specific dry-carbon components that enhance aerodynamics and cooling performance. Professional installation ensures proper fitment and sealing, which are critical for achieving intended handling and thermal benefits. Material quality and accurate alignment are vital, as improper setup can lead to performance issues, structural damage, and compromised aerodynamic efficiency.
The AMG GTS to AMG GTR bumper conversion is a precision body modification that replaces the C190 chassis front fascia with a GTR-specification assembly, incorporating dry-carbon components, widened front fenders, and enlarged cooling intakes to deliver measurable aerodynamic and thermal gains. This is not a cosmetic swap. The GTR front end is functionally distinct from the GTS unit, with wider geometry, dedicated cooling paths, and an integrated front splitter that changes how the car manages airflow at speed. Selecting model-specific, autoclave-cured pre-preg carbon fiber parts and committing to professional installation are the two non-negotiable requirements for a conversion that performs as intended.
What makes the AMG GTS to AMG GTR bumper conversion different from a standard body kit
The GTR front end is engineered around a specific aerodynamic architecture that the GTS front bumper does not share. Body kits designed for the C190 chassis manage underbody airflow and increase downforce in ways that universal or cross-platform kits cannot replicate. When you bolt on a kit that was not developed for the C190 mounting geometry, you get panel gaps, misaligned intake ducts, and aerodynamic interference rather than improvement.
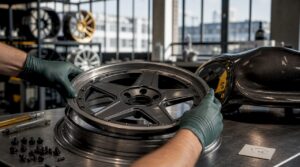
Material selection is equally critical. Dry-carbon and pre-preg carbon fiber provide a superior strength-to-weight ratio and fatigue resistance, properties that matter when components are exposed to aerodynamic loads at highway and track speeds. FRP kits crack under road vibrations and frequently require reinstallation within 12 to 24 months when not prepped correctly. Wet-lay carbon sits between FRP and pre-preg in quality, but it lacks the dimensional stability of autoclave-cured 2×2 twill construction.
- Dry-carbon / pre-preg: Autoclave-cured, lightest weight, highest stiffness, best fatigue resistance
- Wet-lay carbon: Heavier resin content, acceptable finish quality, moderate durability
- FRP (fiberglass reinforced plastic): Lowest cost, highest cracking risk, shortest service life under aerodynamic load
Unbranded carbon kits that lack precision fitment guides frequently require costly body-shop labor to correct mismatches with factory mounting points. That remediation cost often exceeds the price difference between a quality kit and a budget alternative.
Pro Tip: Request a documented compatibility certificate from any supplier before purchasing GTS GTR conversion parts. If a manufacturer cannot confirm C190-specific fitment in writing, treat that as a disqualifying factor.
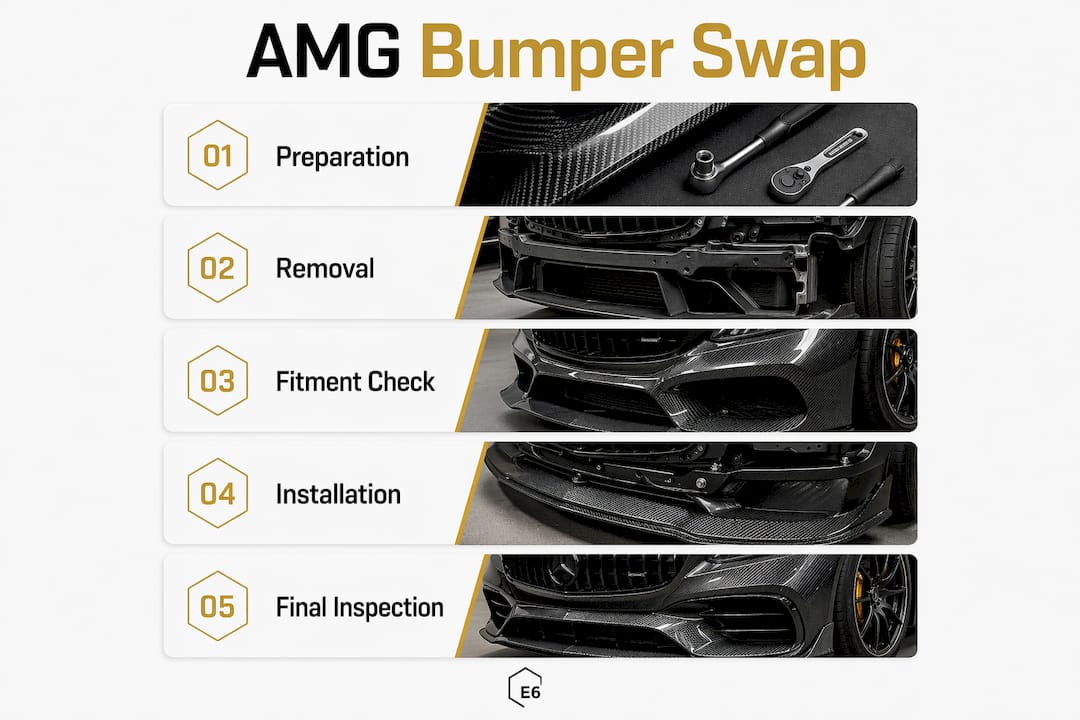
How to execute the front bumper swap step by step
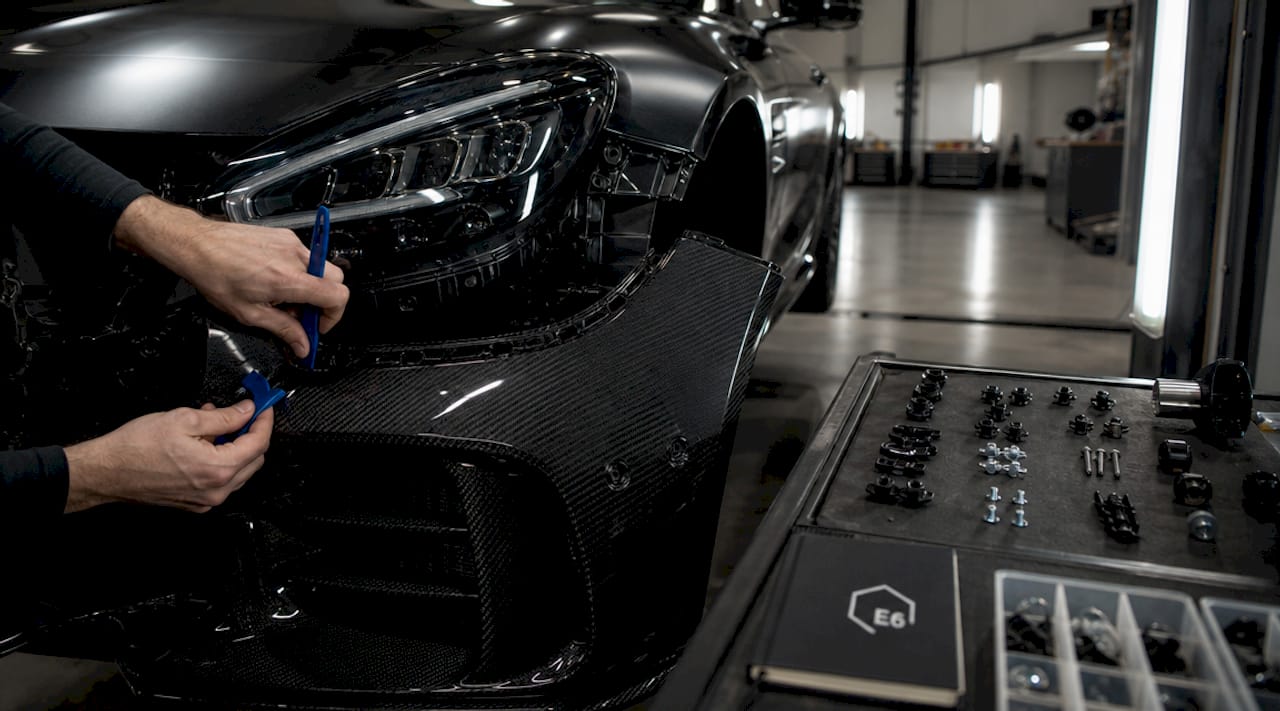
Preparation determines whether this conversion takes one day or three. Gather every component and confirm fitment before the GTS bumper comes off.
Required tools and parts
| Item | Purpose |
|---|---|
| Trim removal tools (plastic pry set) | Prevent clip and sensor damage during GTS bumper removal |
| Torque wrench (5 to 25 Nm range) | Correct fastener load on carbon and aluminum brackets |
| Alignment laser or string gauge | Confirm fender and bumper centerline before final torque |
| Dry-carbon GTR front bumper assembly | Primary conversion component, C190-specific |
| Widened front fenders (carbon or steel) | Required for GTR geometry and tire clearance |
| Dry-carbon front lip and grille inserts | Complete the GTR front fascia and manage intake airflow |
| OEM-spec mounting hardware and brackets | Maintain factory mounting point integrity |
OEM-approved mounting hardware included in factory-licensed kits reduces adjustment labor and preserves structural integrity at the mounting points. Never substitute generic fasteners.
Installation sequence
- Disconnect the battery and remove the front undertray to access all bumper retention clips and wiring harnesses.
- Unplug fog light, parking sensor, and adaptive cruise radar connectors before releasing the GTS bumper from its side clips and upper bolts.
- Remove the GTS front fenders by releasing the inner liner, door jamb bolts, and hood-edge fasteners. Label every connector and bracket.
- Test-fit the widened GTR-specification fenders dry, without adhesive or final torque, and confirm the gap to the hood and door is even on both sides.
- Install the dry-carbon front bumper assembly onto the factory crash bar, routing all sensor harnesses through the designated apertures before tightening any fastener.
- Mount the dry-carbon front lip and grille inserts, confirming that intake duct alignment matches the cooling path geometry of the GTR specification.
- Perform a preliminary alignment check with a laser gauge before applying any sealant. Correct any centerline deviation now.
- Apply OEM-grade polyurethane sealant to all panel joints, then torque all fasteners to specification and reinstall the undertray.
Pro Tip: Before final torque, photograph every panel gap from directly in front of the car. Any asymmetry visible in a straight-on photo will be visible at 20 feet on the finished car.
What aerodynamic and cooling gains does the GTR front end actually deliver
The GTR front bumper is not a styling exercise. The integrated front splitter improves front-end downforce, producing better braking stability and sharper turn-in response at high speeds. These are measurable handling changes, not subjective impressions.
Cooling capacity increases significantly because the GTR front fascia features larger grille openings with dedicated paths for engine bay and brake cooling. The AMG GTR Pro front end requires precise alignment of intakes and ducts to maintain cooling efficiency. A misaligned duct that partially blocks airflow to the intercooler or brake cooling duct can raise operating temperatures enough to trigger thermal protection modes on track.
The widened front fenders contribute beyond aesthetics. Widened fenders coupled with professional alignment reduce lift forces at high speed and improve tire clearance for aerodynamic flow around the front wheels. Reduced front-end lift directly improves steering feel and high-speed confidence, particularly above 120 mph where the GTS front end generates measurable aerodynamic lift.
Key functional gains from a correctly executed AMG front bumper upgrade:
- Increased front downforce from the integrated splitter geometry
- Improved engine bay cooling through larger, purpose-directed intake openings
- Enhanced brake cooling via dedicated duct paths absent on the GTS front end
- Reduced aerodynamic lift at the front axle through widened fender geometry
- Better underbody airflow management reducing drag and preventing aerodynamic instability
Pairing this conversion with a brake system upgrade for the C190 maximizes the thermal management benefits the GTR front end enables.
Common installation challenges and why professional service is mandatory
The GTR Pro front end presents fitment challenges that go beyond what most enthusiasts anticipate. The wider geometry requires precise fender alignment to maintain correct panel gaps at the hood and door edges. A deviation of even 3 mm at the fender-to-hood gap produces a visible asymmetry that no amount of post-installation adjustment can correct without removing the fender again.
Improper installation leads to aerodynamic inefficiencies, paint mismatch, and structural issues that compromise both performance and resale value. Sealant application is particularly unforgiving. Gaps in the polyurethane bead at panel joints allow water ingress that causes carbon delamination and corrosion at steel mounting points over time.
Common pitfalls in DIY AMG GTS bumper upgrade attempts:
- Incorrect sensor harness routing causing parking sensor or radar malfunction
- Undertorqued fender fasteners producing vibration and panel movement at speed
- Misaligned cooling ducts reducing airflow to brakes and intercooler
- Sealant voids at panel joints allowing moisture ingress and carbon delamination
- Paint color mismatch at fender-to-door gaps from incorrect panel positioning
E6 Carbon designs its AMG GTR conversion parts to match factory design language, which reduces integration complexity. However, design compatibility does not eliminate the need for professional installation.
Mandatory disclaimer: The front bumper assembly and any associated aerodynamic components must be professionally installed and sealed by a qualified technician. E6 Carbon accepts no liability for damage, injury, or performance loss resulting from improper installation of any conversion component.
Key takeaways
A successful AMG GTS to AMG GTR bumper conversion requires C190-specific dry-carbon components, professional alignment of cooling ducts and widened fenders, and OEM-grade sealing to deliver genuine aerodynamic and thermal performance gains.
| Point | Details |
|---|---|
| Use C190-specific parts only | Universal kits misalign cooling ducts and mounting points, creating fitment and performance deficits. |
| Choose dry-carbon over FRP | Pre-preg autoclave-cured carbon resists fatigue and cracking where FRP fails within 12 to 24 months. |
| Align cooling ducts precisely | Misaligned GTR intakes restrict airflow to brakes and intercooler, triggering thermal protection on track. |
| Widened fenders require laser alignment | A 3 mm gap deviation at the hood edge is visible and requires full fender removal to correct. |
| Professional installation is mandatory | Improper sealing causes delamination and voids warranty protection on all conversion components. |
Why material and fitment quality cannot be treated as optional
At E6 Carbon, we have seen every variation of this conversion. Enthusiasts who source the cheapest available GTR-style front end and attempt a self-install consistently arrive at the same outcome: a car that looks approximately right from 30 feet but has misaligned cooling ducts, panel gaps that shift at speed, and sealant voids that show up as water stains inside the fender liner six months later.
The GTR front fascia is not a decorative upgrade. It is an aerodynamic system. Every intake opening, every fender radius, every splitter angle exists to manage airflow in a specific way. When one element is misaligned, the entire system underperforms. We have measured this directly on C190 platforms where a partially blocked brake cooling duct raised rotor temperatures by over 40 degrees Celsius during a single track session compared to a correctly installed unit.
The other consistent mistake is treating the GTR-style carbon wing as a separate decision from the front bumper conversion. Front and rear aerodynamic balance must be addressed together. Adding front downforce without corresponding rear downforce adjustment changes the handling balance in ways that can be genuinely dangerous at track speeds.
Invest in pre-preg dry-carbon components from a manufacturer who can document C190-specific fitment. Then invest in a qualified installer who has completed this conversion before. The performance gains are real and significant. But they require the right parts and the right hands.
— E6 Engineering
Upgrade your AMG GT with E6 Carbon GTR conversion parts

E6 Carbon’s AMG GTR front bumper conversion components are engineered specifically for the C190 chassis, using autoclave-cured pre-preg dry-carbon construction that matches factory design language while reducing front-end weight. Every kit includes OEM-spec mounting hardware and documented fitment guides to minimize installation complexity. The dry-carbon front lip, grille inserts, and widened fender components are designed to integrate with factory sensor mounting points, preserving parking sensor and adaptive cruise radar function. Professional installation is strongly advised for all conversion components. Visit E6 Carbon to explore the full AMG GTR conversion catalog and request a fitment consultation for your C190 platform.
FAQ
What is an AMG GTS to AMG GTR bumper conversion?
The conversion replaces the factory Mercedes-AMG GTS front fascia with a GTR-specification assembly, including a wider bumper, enlarged cooling intakes, integrated front splitter, and widened front fenders designed for the C190 chassis.
Why does material choice matter for this bumper swap?
Dry-carbon and pre-preg kits outperform FRP in fatigue resistance and dimensional stability. FRP alternatives crack under road vibration and often require reinstallation within 12 to 24 months.
Can I install the GTR front bumper myself?
Professional installation is mandatory. Improper sealing and misalignment cause aerodynamic inefficiencies, paint mismatch, and structural damage. E6 Carbon does not accept liability for improperly installed components.
What performance gains does the GTR front end provide?
The GTR bumper delivers increased front downforce via the integrated splitter, improved engine and brake cooling through larger intake openings, and reduced aerodynamic lift through widened fender geometry, all of which are measurable at track speeds.
Do I need to upgrade the rear wing at the same time?
Adding front downforce without adjusting rear aerodynamic balance changes the handling characteristics of the C190 platform. Addressing front and rear aerodynamics together produces a balanced, predictable result at speed.