Yes. E6 Carbon’s autoclave-cured pre-preg aero kits can be integrated into a factory assembly line when three engineering controls are in place: process-controlled autoclave curing, Fitment First datum tooling, and factory-grade sealing and fastening protocols. Skip any one of them and you inherit rework, warranty claims, and inconsistent gap-and-flush results across your build sheet.
The E6 Carbon Elite Kit for the Lexus LC500 is the clearest working example of this approach. It ships mold-accurate to the LC500’s factory datum points, which means a production line does not have to improvise fixturing on the fly. That single detail changes an entire installation workflow, from receiving through final QA.
Three non-negotiables govern whether any factory can run E6 pre-preg components without disrupting takt time:
- Autoclave process control — consistent cure cycles (time, temperature, pressure) so every panel arrives at the same cured thickness and fiber consolidation.
- Datum-based fitment tooling — jigs and fixtures built to the vehicle’s own mounting geometry, not generic clamps.
- Sealing and fastener protocol — a defined sequence for gasketing, torque, and water-sealing at every seam before the part leaves the line.
Key Takeaways
Factory-level integration of E6 Carbon aero components succeeds when autoclave process control, datum-based fitment tooling, and documented sealing protocols are applied together, not in isolation.
| Point | Details |
|---|---|
| Three non-negotiables | Autoclave process control, datum-based fitment tooling, and sealing protocols must all be in place before line integration. |
| Autoclave beats wet layup | Lower void content and consistent resin control cut rework at gap-and-flush inspection across production runs. |
| Sealing is not optional | Every mounting point and seam needs professional water-sealing, per E6’s own installation guidance. |
| Traceability closes the loop | Linking autoclave lot IDs to MES work orders lets engineers trace any field issue back to specific cure parameters. |
| Start with the Elite Kit | The E6 Carbon Elite Kit for Lexus LC500 offers a documented install sequence and QC checkpoints ready for pilot-scale factory integration. |
Table of Contents
- Kit Contents and What Factory Receiving Should Expect
- Autoclave Pre-Preg Specs Production Teams Need to Plan Around
- Why Autoclave Pre-Preg Wins Over Wet Layup on a Factory Line
- Show Finish or Track Durability: Choosing the Right Spec
- Which Programs See the Best Return From Factory Integration
- Platform Notes: Mercedes-AMG, Lexus LC500, and Exotic Expansion
- Pricing Bands, Ordering, and Lead-Time Planning
- The Factory Assembly and Water-Sealing Checklist
- Layup Strategy, Repairability, and Serviceability by Design
- Connecting E6 Kits to Your MES, ERP, and Traceability Systems
- E6 Engineering’s Perspective on Fitment First and Production Outcomes
- Request an Engineering Pack for Your Pilot Line
- Integration and Manufacturing Resources Worth Reviewing
- Sources
- FAQ
Kit Contents and What Factory Receiving Should Expect
A properly kitted E6 order removes guesswork at the loading dock. Production planners who treat aero kits like generic trim pieces run into trouble almost immediately, usually at the receiving inspection stage where mislabeled or incomplete hardware sets stall a line.
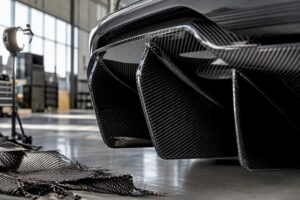
Each E6 Carbon Elite Kit ships with the aero panels themselves (front lip, splitters, rear diffuser, or side skirts depending on platform), mounting hardware sized to the vehicle’s factory bolt pattern, and a hardware manifest keyed to part number and VIN when kitted for sequenced production. Panels arrive with any captive inserts already bonded in place during the autoclave cure, not added as a separate assembly step. This matters because retrofitting inserts after cure introduces variability that a factory QA gate will catch late, after labor is already sunk into the part.
Expect these elements in a standard receiving package:
- Autoclave-cured aero panels labeled by position (left/right, front/rear) and finish code.
- A hardware kit with fasteners, isolators, and any factory-style clips matched to the OEM mounting points.
- A fitment reference sheet showing torque values and sealant call-outs per mounting location.
- Optional VIN-specific kitting for dealer-fit or boutique production runs, versus bulk line-side delivery for higher-volume programs.
Sequence of delivery depends on production scale. A dealer-fit accessory program handling a handful of LC500s per month typically wants kitted-per-VIN boxes that match a specific build sheet. A higher-volume conversion program benefits more from bulk line-side delivery with lot tracking handled through the receiving system rather than box-by-box matching. Either way, the manifest should tie back to a lot ID from the autoclave batch, because that traceability becomes critical if a dimensional issue surfaces three months into production.
Autoclave Pre-Preg Specs Production Teams Need to Plan Around
Engineering and QA teams cannot plan inspections against vague material claims. They need numbers. E6’s autoclave-cured 2×2 twill pre-preg construction is chosen specifically because it behaves predictably across a production run, not just in a single hero part.
Pro Tip: Request the cured-ply schedule alongside the CAD package before your first pilot build. Knowing ply orientation at each zone lets your QA team set realistic tolerance bands instead of applying a single blanket spec across the whole panel.
Autoclave curing under controlled pressure and heat produces a denser, more uniform laminate than layups cured at ambient conditions. Composite materials engineering broadly recognizes that autoclave processing reduces void content and improves fiber-to-resin consolidation compared with wet layup, which is the mechanism behind more predictable geometry panel to panel. That consistency is what a factory actually needs, because a production line cannot afford to hand-fit every unit.
What production teams should plan around:
- Cured-thickness consistency. Expect tight, repeatable thickness bands across a given panel zone rather than the wider variation typical of hand-laid wet layup.
- Dimensional tolerance bands. Fitment-critical zones (mounting bosses, seam edges) should hold to tolerances your fixture design can actually accommodate. Build your jig tolerance stack-up around the panel spec, not the other way around.
- Void content expectations. Lower void content directly supports structural predictability at load-bearing mount points, which matters more on track-oriented aero than on static show trim.
- Inspection methodology. CMM (coordinate measuring machine) checks on mounting bosses and laser scanning against the reference CAD model are the two methods that catch out-of-tolerance parts before they reach final assembly, not after.
Acceptance criteria should be established during the pilot phase, not invented on the fly during full production. A part that scans clean against CAD at three critical datum points but fails at a fourth is still a reject, and your acceptance protocol needs to say so in writing before line workers start torquing fasteners.
Why Autoclave Pre-Preg Wins Over Wet Layup on a Factory Line
Wet layup can produce a beautiful one-off panel. It struggles to produce fifty identical ones. That distinction is the entire argument for autoclave processing in a factory context, and it is worth understanding the mechanism, not just accepting it as a brand preference.
Autoclave curing standardizes resin flow and fiber compaction under controlled pressure, which is why panel-to-panel repeatability improves so much compared with hand-applied wet layup, where resin ratios shift with every layup technician’s hand pressure. Lower void content and tighter resin control mean parts arrive closer to nominal dimensions, which translates directly into fewer rework cycles at gap-and-flush inspection. A factory that has to shim, sand, or reheat-form a wet-layup panel to hit its mating surface is burning labor hours that an autoclave-cured panel simply does not require. You can compare the two processes in more depth in E6 Carbon’s breakdown of pre-preg versus wet layup manufacturing.
The tradeoffs are real and worth stating plainly:
- Autoclave-cured parts carry a higher per-unit material and process cost than wet layup equivalents.
- Autoclave access is a real constraint. Most vehicle assembly plants don’t operate their own autoclave, so this step typically happens supplier-side before parts ever reach the factory floor.
- Lead time is tied to cure cycle scheduling at the composite supplier, not to your own line’s capacity.
For any factory-integration program where fitment consistency and reduced rework outweigh a marginal cost delta, autoclave pre-preg is the only defensible choice.
Show Finish or Track Durability: Choosing the Right Spec
The finish level you specify should follow the vehicle’s actual use case, not the showroom photo. This decision point gets skipped more often than it should, and it causes real problems six months after delivery.
For show cars and low-volume boutique conversions, a high-gloss autoclave-cured 2×2 twill finish with full clearcoat delivers the visual depth that sells a build at a concours or dealer showcase. Weave alignment across panel seams matters more here than anywhere else, because a mismatched twill pattern at a seam line is the first thing a discerning buyer notices.
Track-focused builds need a different conversation entirely:
- Specify reinforced mounting zones at high-load attachment points, since track use introduces vibration and cornering loads that show cars never see.
- Consider a matte or satin clearcoat rather than high-gloss, since it hides stone chips and minor abrasion better between race weekends.
- Budget for sacrificial edge protection at splitter and diffuser leading edges, where curb strikes and track debris cause the most damage.
- Plan a repair protocol in advance rather than a full-panel replacement policy, since track components take hits that show cars simply don’t.
A dual-purpose owner, someone who shows the car at events and tracks it on weekends, usually lands on a middle spec: full-gloss finish with reinforced mounting points underneath. That combination costs more than a pure show spec but avoids the false economy of replacing a cracked splitter every other season.
Which Programs See the Best Return From Factory Integration
Factory-level integration isn’t the right call for every buyer. It makes the most sense for three specific profiles, and understanding which one you fall into shapes almost every decision downstream.
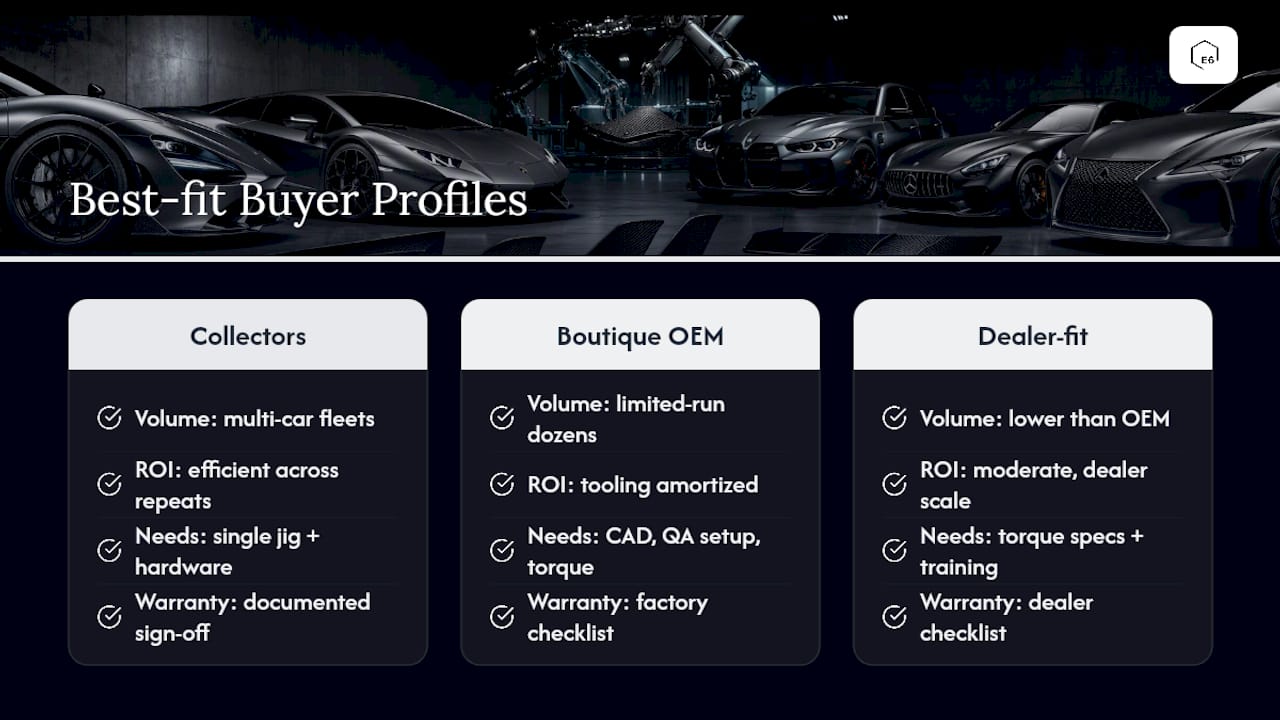
Private collectors running multi-car fleets benefit when a single fitment jig and hardware set can service several identical builds without re-engineering fitment each time. Boutique OEM conversion programs, the kind producing limited runs of a specific trim package, get the clearest ROI because the fixed cost of tooling and QA setup amortizes across dozens of units instead of one. Dealer-fit accessory programs sit in the middle: lower volume than a boutique OEM run, but with warranty handoff requirements that demand documented torque specs and sealing records for every unit installed.
Operationally, expect E6 to provide the CAD reference package, torque specifications, and an installer training session as part of onboarding. Warranty handoff works best when the factory or dealer installer signs off against a documented checklist rather than relying on installer memory.
For a pilot program, five to ten units is a realistic starting batch. That’s enough to surface fixture and tolerance issues without committing to full-volume tooling before you know your gap-and-flush numbers hold up. Track rework rate and average install time per unit as your two core success metrics before scaling further.
Platform Notes: Mercedes-AMG, Lexus LC500, and Exotic Expansion
Fitment engineering doesn’t transfer cleanly between platforms, even within the same manufacturer’s lineup. Each chassis has its own sensor placement, panel gap tolerance, and mounting geometry, and a factory integration plan needs platform-specific detail, not a generic aero installation guide.
Mercedes-AMG mounting and sensor integration
AMG platforms typically route parking sensors and radar modules through or near front fascia mounting zones, which means aero component design has to account for sensor cutouts and connector routing before the panel ever reaches the line. Tolerance targets at these interfaces run tighter than at purely cosmetic seams, since a misaligned sensor cutout can trigger a diagnostic fault that has nothing to do with the aero panel itself but everything to do with how it was fitted. Mounting interface points on AMG front and rear aero components should be checked against the factory sensor harness routing during the CAD verification stage, not discovered during final assembly.
Lexus LC500: the Elite Kit installation sequence
The E6 Carbon Elite Kit for the LC500 is built around a recommended install sequence that starts with the rear diffuser, moves to side skirts, and finishes with the front lip, largely because the diffuser mounting points establish the rear ride-height reference that the rest of the kit indexes against. For dealer-fit programs, packaging each panel in VIN-matched crates with the fastener kit pre-sorted by installation step reduces installer error significantly. QC checkpoints should occur after diffuser mounting (verifying ground clearance datum), after side skirt fitment (checking seam gap against the rocker panel), and at final front lip torque-down (confirming sensor cutout alignment if the LC500 trim includes front parking sensors).

McLaren and Lamborghini: reinforcement and surface protection
Exotic platform expansion introduces surfaces that are frequently already carbon fiber from the factory, which raises the stakes on finish matching and reinforcement strategy. Aero components destined for McLaren or Lamborghini chassis benefit from reinforced attachment points at high-vibration zones near the engine bay, since these platforms see track use more often than typical luxury coupes. Finish protection matters here too: matching weave direction and gloss level against factory carbon trim takes more care than matching against a painted panel, where a slight sheen mismatch is far more forgiving.
Pricing Bands, Ordering, and Lead-Time Planning
Budgeting for a factory integration program means understanding what actually pushes a kit into a higher price bracket, not just accepting a quoted number without context.
Base pricing for an autoclave-cured aero kit scales with panel count, finish complexity, and reinforcement requirements. A show-spec kit with standard gloss clearcoat sits at the lower end of the range. Adding reinforced mounting zones, custom finish matching to an exotic platform’s factory carbon, or expedited cure scheduling all push the price upward, sometimes substantially, depending on how much custom engineering the reinforcement requires.
Order planning should account for:
- Minimum order quantities for boutique OEM programs, which typically need a committed batch size before E6 schedules dedicated autoclave capacity.
- Batch sizing aligned to your pilot program size (five to ten units, as noted earlier) before scaling to full production runs.
- Just-in-sequence supply options for higher-volume dealer-fit programs, where kits arrive matched to a rolling production schedule rather than as one large upfront batch.
Lead time for a standard configuration typically runs shorter than for custom finish or reinforcement work, since custom specs require additional tooling or mold adjustment before the autoclave cure cycle can even begin. Build in buffer time for any custom finish request. A rushed custom order is where quality slips first, and it’s the single most common cause of delayed pilot programs.
The Factory Assembly and Water-Sealing Checklist
This is the sequence that determines whether an installation looks factory-original or looks like an aftermarket add-on. E6 Carbon’s own product guidance is explicit on this point: autoclave-cured aero components require professional installation and strict water-sealing at every mounting point and seam. Skipping that step is the single most common cause of warranty claims on aero installations, and it’s entirely avoidable with a documented process.
Pro Tip: Run a dry-fit pass on every panel before any adhesive or sealant touches the surface. A five-minute dry fit catches a fixture misalignment that would otherwise cost you a full panel replacement after cure-time adhesive has already set.
- Verify against CAD before touching the vehicle. Scan the incoming panel or spot-check critical datum points against the reference CAD model. Reject any panel outside tolerance before it reaches the fixture, not after.
- Set up datum-based fixtures. Load the panel into a jig built to the vehicle’s own mounting geometry, never a generic universal clamp. This is the core of Fitment First engineering, and it is the single biggest source of variance elimination on the line.
- Dry-fit the full assembly. Check gap and flush at every seam before applying any adhesive, sealant, or torque. Adjust fixture position now, while changes cost nothing.
- Engage captive hardware in sequence. Follow a defined torque sequence, typically working from the center mounting point outward, mirroring the stepwise torque procedures used across composite component assembly generally, similar to the sequenced clamp-and-torque approach documented in BMC’s ICS Carbon Aero Cockpit assembly manual for a comparable high-performance carbon component.
- Prep surfaces before sealing. Clean and degrease every mating surface. Any residual mold release or handling oils will compromise sealant adhesion at the seam.
- Apply sealant and gasketing at every mounting point. No seam gets skipped, including ones that seem cosmetically hidden. Water intrusion at an unsealed seam is a slow failure that surfaces months later as trim delamination or interior water damage.
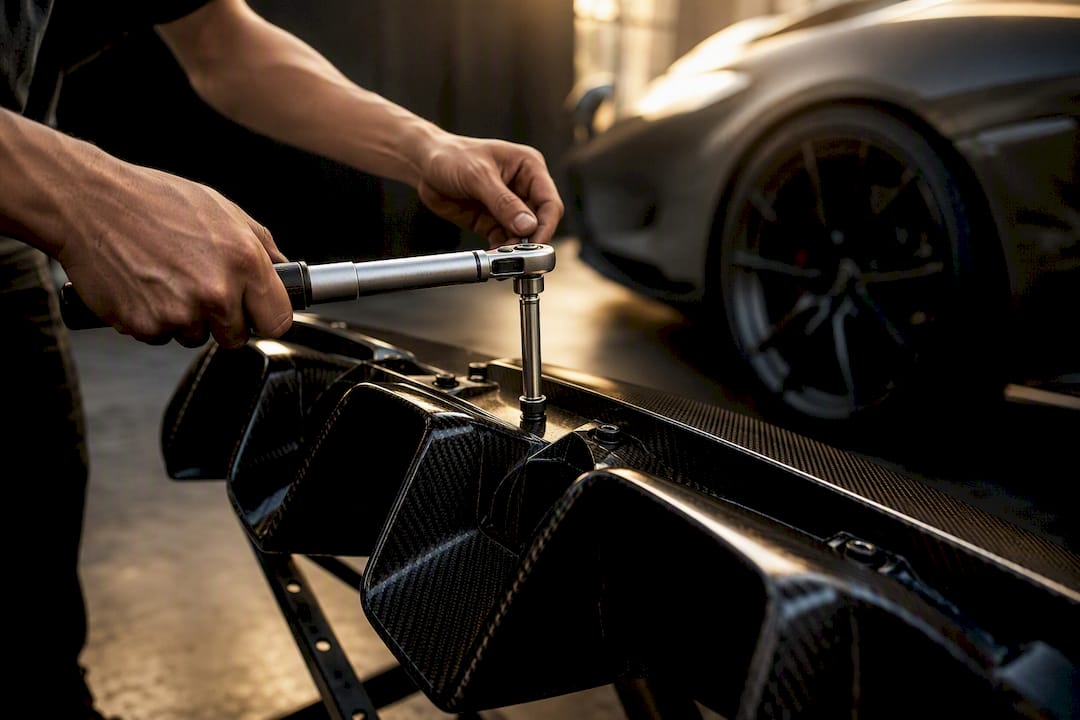
- Torque fasteners to spec, in sequence. Use the torque values supplied in the E6 engineering pack. Over-torquing composite mounting points is a common installer error that cracks the panel at the insert.
- Run a leak or pressure test where feasible. For components sealing against a wheel well or underbody area, a basic water-spray test after cure confirms seal integrity before the vehicle leaves the line.
- Final dimensional and visual QA. Recheck critical datum points, confirm weave alignment across visible seams, and verify any sensor cutouts still align with harness routing.
- Functional verification. Confirm parking sensors, radar modules, or any electronics routed near the aero component still function correctly post-installation.
Every one of these steps should have a sign-off field on your build sheet. A checklist that exists only in an installer’s head is not a QA process. It’s a hope.
Layup Strategy, Repairability, and Serviceability by Design
Ply orientation is not a cosmetic decision. It’s a structural one, and it shapes how a panel behaves under both static load and impact.
A 2×2 twill layup oriented to align load paths with the panel’s primary stress axis gives you higher stiffness where it matters most, typically along the leading edge of a splitter or the mounting rail of a diffuser, without adding unnecessary material weight elsewhere on the panel. Impact behavior changes with orientation too: a layup optimized purely for stiffness can behave more brittle under a sharp impact than one designed with slightly more compliance at high-risk zones like splitter leading edges.
Design-for-repair thinking matters just as much as initial layup strategy. Building in reinforcement zones at known high-wear points, using replaceable modular sections rather than a single monolithic panel, and specifying sacrificial attachment points that absorb minor impacts before the load reaches structural fasteners all extend a component’s usable life on a track car far more than a single stiffness-optimized layup ever could. Finish and clearcoat damage from minor stone chips can typically be repaired locally. Structural delamination at a mounting point, on the other hand, should trigger full panel replacement rather than a field repair, since a repaired structural zone rarely returns to its original strength. You can find more on post-installation finish work and repair thresholds in E6 Carbon’s finishing workflow guide for manufacturers.
Connecting E6 Kits to Your MES, ERP, and Traceability Systems
None of the fitment and sealing discipline above matters if your production data doesn’t capture it. A panel that passes QA but has no traceable record of its autoclave cure parameters is a liability the first time a warranty question comes up eighteen months later.
Mapping each E6 kit component to an ERP part number, then linking the autoclave batch lot ID to the corresponding MES work order, is the foundation of real traceability. That link is what lets a production engineer pull up cure time, temperature, and pressure for any specific panel months after it left the line, which matters enormously if a field issue surfaces on one unit but not others from the same batch.
FactoryTrace documents that open-architecture platforms with pre-built connectors for systems like SAP and Oracle can automatically sync production orders and inventory data, removing the manual re-entry step that introduces errors in the first place. Similarly, iFactory AI’s connector framework supports OPC-UA and Modbus protocols that let PLCs feed curing-cycle data directly into SAP or comparable ERP systems, often going live within weeks rather than months when connector pairs already exist.
| Integration phase | What it accomplishes |
|---|---|
| BOM and part mapping | Links each kit component to an ERP part number for inventory and cost tracking. |
| Connector configuration | Deploys pre-built OPC-UA or Modbus connectors to capture autoclave cure parameters automatically. |
| End-to-end data flow testing | Confirms lot IDs, cure data, and QC results flow correctly from PLC to MES to ERP before go-live. |
| Monitored go-live | Runs the connected system alongside manual tracking briefly to catch discrepancies before full cutover. |
Factory Thread’s data virtualization approach offers an alternative worth considering: it enables live cross-system queries without duplicating production data into a separate database, which reduces both integration complexity and the risk of your MES and ERP records drifting out of sync over time. Whichever architecture you choose, run the go-live phase in parallel with manual tracking first. Cutting over cold, without a monitored transition period, is how a promising integration project turns into a production-floor fire drill.
E6 Engineering’s Perspective on Fitment First and Production Outcomes
Fitment First isn’t a marketing phrase inside E6. It’s the reason a Lexus LC500 diffuser installs without a fixture rebuild and a Mercedes-AMG front lip clears its sensor housing on the first attempt. Chassis-specific datum tooling and mold-accurate panels exist because rework at the line is the most expensive place to discover a tolerance problem, far more expensive than catching it during pilot fitment review.
The platforms getting the most engineering attention right now, Mercedes-AMG and the Lexus LC500 specifically, reflect where factory-integration demand is concentrated. McLaren and Lamborghini expansion work follows the same fitment discipline, adapted for exotic surface matching and reinforced mounting zones. The principle doesn’t change with the platform: build the tooling around the chassis, not the other way around.
— E6 Engineering
Request an Engineering Pack for Your Pilot Line
Everything covered here, the autoclave specs, the fixture requirements, the sealing checklist, comes standard in E6 Carbon’s engineering pack for production partners. For a pilot program, E6 provides the CAD reference package, torque specifications, kitted sample panels, and installer training so your team can validate fitment and sealing before committing to a full production batch.
Requesting a pack starts with identifying your platform and intended volume, whether that’s a five-unit dealer-fit pilot or a boutique OEM run scaling toward twenty. From there, E6’s engineering team scopes the kitting approach, VIN-matched or bulk line-side, based on your production cadence. If your program centers on the LC500, the E6 Carbon Elite Kit for Lexus LC500 is the direct starting point: review the product specifications there and request a pilot quote to get CAD files and torque documentation into your engineering team’s hands before your next production planning cycle.
Integration and Manufacturing Resources Worth Reviewing
Beyond E6’s own engineering documentation, a few outside resources are worth a production team’s time when scoping an MES/ERP integration project or refining a Design for Manufacturing (DFM) process around composite components.
- FactoryTrace’s integration overview covers pre-built ERP and MES connectors, useful reference when scoping SAP or Oracle connectivity for lot-level traceability.
- iFactory AI’s connector documentation details OPC-UA and Modbus protocol support for pulling curing-cycle data directly from PLCs into enterprise systems.
- Factory Thread’s data virtualization platform explains an approach to cross-system data access that avoids duplicating production records.
- HLH Sheet Metal’s guide to AI tools for DFM covers design-stage tooling that can shorten iteration cycles during pilot fitment review.
- E6 Carbon’s manufacturing insight on wheel performance offers cross-reference material on the QC discipline behind precision-manufactured components.
- E6 Carbon’s explainer on why cheap carbon fiber parts fail at speed reinforces why tolerance and material quality matter most at track speeds.
Sources
- Smart Manufacturing Integrations | FactoryTrace Solutions
- Integrations | iFactory AI | SAP, PLC, SCADA, GPS & Accounting Connectivity
- Factory Thread Data Virtualization Platform
FAQ
What Is Fitment First Engineering?
Fitment First is E6 Carbon’s approach of building aero components and mounting hardware around a specific chassis’s factory datum points, which reduces fixture rework and gap-and-flush issues during factory installation.
Can E6 Aero Kits Be Installed on an Existing Production Line Without Retooling?
Most programs need datum-specific fixtures rather than a full retool, since the E6 Carbon Elite Kit and comparable pre-preg components are mold-accurate to the target chassis’s existing mounting geometry.
Why Does Autoclave Curing Matter for Factory Integration Specifically?
Autoclave curing produces lower void content and more consistent resin control than wet layup, which means panels arrive closer to nominal dimensions and require less rework at final assembly.
What Does a Pilot Program for E6 Factory Integration Typically Involve?
A pilot usually covers five to ten units, kitted per VIN, with engineering pack documentation covering torque specs, CAD reference files, and sealing protocol before scaling to full production volume.
Is Water-Sealing Really Required at Every Mounting Point?
Yes. E6 Carbon’s own installation guidance specifies professional water-sealing at every mounting point and seam, since even a single unsealed seam can lead to water intrusion and trim delamination over time.