Cheap carbon fiber parts fail at high speed because manufacturing defects, most often voids and resin-rich zones from uncontrolled wet layup, combine with weak or unspecified resin systems to trigger delamination and brittle matrix failure once aerodynamic loads and vibration hit the part. This isn’t a slow fade. Carbon fiber composites don’t bend and warn you first; they crack and let go.
Two numbers should anchor how you think about this. Many budget aftermarket parts weigh 15 to 20 percent more than the factory piece they replace, because manufacturers pile on non-structural resin to hide a sloppy weave. And UV exposure alone can visibly degrade that resin, causing chalking and cracking, within roughly 3 to 5 years.
Before you bolt anything onto your Mercedes-AMG, Lexus LC500, or McLaren, do three things:
- Avoid parts with no stated fiber volume fraction or cure method listed anywhere.
- Inspect for uneven weave alignment, dull or cloudy resin, and heavier-than-stock weight.
- Ask the seller directly whether the part was autoclave-cured or wet-laid, and demand documentation.
Key Takeaways
Cheap carbon fiber parts fail at high speed when manufacturing voids and unspecified resin systems combine with mounting stress and environmental aging to trigger sudden, warning-free delamination.
| Point | Details |
|---|---|
| Root cause is manufacturing | Voids and resin-rich zones from wet layup, not the fiber itself, drive most delamination failures. |
| Weight can signal quality problems | Budget parts running 15 to 20 percent heavier than OEM plastic often hide excess non-structural resin. |
| Moisture is the hidden threat | Hygrothermal exposure can cause up to a 35 percent compressive strength loss in aged laminates. |
| Assembly matters as much as the part | Rigid bolting without isolation or backing reinforcement creates fatigue cracks at mounting points regardless of laminate quality. |
| Documentation separates safe parts from risky ones | E6 Carbon’s autoclave-cured process logs fiber volume fraction and cure records that budget wet-layup sellers rarely provide. |
Table of Contents
- Why Cheap Carbon Fiber Parts Fail at High Speed: The Manufacturing Root Cause
- What Actually Fails: Delamination, Cracking, and Fiber Break at Speed
- Fitment, Bonding, and Assembly: The Failure Points Beyond the Part Itself
- How Heat, Moisture, and UV Quietly Weaken the Resin Matrix
- How to Spot Early Signs of Delamination Before It Fails
- Repair, Replace, or Monitor: Realistic Lifespan Expectations
- The E6 Carbon Approach to Solving High-Speed Failure
- What the Industry Won’t Tell You About “Carbon Fiber” Labeling
- Get Engineered Aerodynamic Parts Built for Real Speed, Not Just Looks
- Sources
- FAQ
Why Cheap Carbon Fiber Parts Fail at High Speed: The Manufacturing Root Cause
The failure almost always traces back to how the part was made, not just what it’s made of. Two manufacturing routes dominate the aftermarket, and the gap between them explains most of the cheap carbon fiber drawbacks enthusiasts run into.
Wet layup, sometimes called hand layup, is exactly what it sounds like. A technician lays dry carbon fiber cloth into a mold, saturates it with liquid resin by hand or roller, then pulls a vacuum bag over the assembly to compress it before the resin cures at room temperature. It’s fast, cheap, and requires minimal capital equipment, which is exactly why it dominates the budget end of the aftermarket. It’s also almost entirely dependent on the skill and consistency of whoever is holding the roller that day.
That operator dependence is the real problem. Resin distribution varies from batch to batch and even panel to panel. You get resin-rich pockets in some areas and resin-starved, fiber-dry zones in others. Air gets trapped between plies, creating voids. Fiber orientation drifts because the cloth shifts slightly during hand placement, which means the load path engineers assumed on paper doesn’t match what’s actually sitting in the mold. A review of pultruded and wet-process composites confirms this variability creates local property variations that compromise long-term durability, especially once mechanical loads and environmental exposure start working together.
Prepreg and autoclave curing takes the human variable almost entirely out of the equation. The carbon fiber arrives from the mill already impregnated with a precisely metered amount of resin, held in a frozen or refrigerated state until it’s needed. Technicians lay the prepreg into the mold, then the entire assembly goes into an autoclave, a pressurized oven that applies heat and up to several atmospheres of pressure simultaneously. That pressure squeezes out trapped air and forces the resin to flow evenly through the fiber bed, producing a laminate with a controlled, repeatable fiber volume fraction and a fraction of the void content you’d get from a vacuum bag alone.
The difference shows up everywhere that matters for a part spinning through 130 mph aero loads.
| Comparison Dimension | Wet Layup | Prepreg / Autoclave |
|---|---|---|
| Structural integrity at speed | Inconsistent; prone to early delamination | Higher resistance to delamination under cyclic loads |
| Void content / cure quality | Higher voids, operator-dependent | Low, tightly controlled void content |
| Weight (fiber vs. resin) | Resin-heavy, lower fiber volume fraction | High fiber volume fraction, lighter for the same stiffness |
| Cost and fitment assurance | Lower upfront cost, variable fitment | Higher cost, tighter tolerances and fitment |
| Track/high-speed suitability | Risky for sustained high-speed use | Engineered for track and high-speed service |
Pro Tip: Ask any vendor selling “autoclave cured” or “dry carbon 2×2 twill” parts for their fiber volume fraction, vacuum bag pressure logs, or cure cycle records. A legitimate manufacturer keeps this data as part of standard quality control documentation; if they can’t produce it, assume the part was wet-laid regardless of what the listing claims.
If you want the deeper technical breakdown of these two processes, E6 Carbon’s prepreg versus wet layup comparison walks through the cure chemistry in more detail.
What Actually Fails: Delamination, Cracking, and Fiber Break at Speed
Here’s the part most buyers underestimate: carbon fiber doesn’t fail like metal. A steel bracket bends, groans, and gives you visual warning before it lets go. A carbon fiber laminate is a brittle composite. It holds its shape right up until a crack reaches critical length, and then it fails suddenly, with essentially no plastic deformation to warn you. Research on compressive failure behavior in carbon fiber confirms this brittle, sudden failure mode is intrinsic to the material, not a manufacturing accident. The manufacturing choices determine when that failure happens, not whether the material can bend first.
At highway and track speeds, the specific failure modes worth knowing are:
- Delamination: adjacent plies separate from each other when interlaminar bond strength is exceeded, usually starting at a void or resin-poor zone.
- Interlaminar shear failure: the resin matrix between layers shears apart under repeated flex, a common outcome of weak or under-cured resin systems.
- Fiber pullout: individual fibers separate from the surrounding resin because of poor interfacial adhesion, a problem surface pre-treatments like oxidative or plasma processing are specifically designed to prevent.
- Void-initiated crack growth: trapped air pockets from wet layup act as stress concentrators, giving cracks a starting point they wouldn’t otherwise have.
- BVID propagation: barely visible impact damage from something as minor as a stone chip or a parking lot bump creates internal microcracking invisible from the outside, which then grows under repeated stress.
None of these failures need a dramatic event to start. At speed, the triggers are mundane and constant: aerodynamic pressure cycling as a splitter or diffuser flexes with every change in airflow, high-frequency vibration transmitted through the chassis, stress concentrated at every mounting bolt, and a stiffness mismatch between a flexible aftermarket panel and the rigid mounting points it bolts to.
Consider what that means on a Mercedes-AMG GT running a front lip at speeds where downforce is doing real work. A void the size of a grain of rice, buried between plies from a rushed vacuum bag cycle, sits invisible under the clear coat. Every mile of vibration and every pressure cycle nudges a crack outward from that void. There’s no bending, no creak, no warning. At triple-digit speeds, BVID acts as a stress concentrator that can propagate rapidly enough that a component separates from the vehicle with essentially zero notice to the driver.
That’s the safety stakes in plain terms: a defect too small to see with the naked eye, sitting inside a part that gives no structural warning before it goes.
Fitment, Bonding, and Assembly: The Failure Points Beyond the Part Itself
A perfectly engineered panel installed badly fails just as fast as a badly made one. Assembly is where a lot of otherwise decent parts get undone, and it’s one of the most overlooked cheap carbon fiber drawbacks because buyers assume the part itself is the only variable.
The recurring weak points are predictable once you know what to look for. Rigid bolting directly through a carbon laminate without any isolating bushing or grommet concentrates every bump and vibration cycle into a tiny contact patch, and composites handle concentrated point loads far worse than distributed ones. Adhesive specification matters just as much: a generic panel adhesive not rated for the temperature swings and flex a front splitter sees will let go long before the carbon itself fails. Insufficient backing reinforcement at mounting points means the bolt hole is trying to carry structural load through a section of laminate never designed to take it. And drilling new holes for a bracket or sensor, without checking fiber orientation first, can sever the very load path the part depends on for stiffness.
A mounting point drilled straight through a load-bearing ply, with no backing plate and no isolation bushing, turns a well-engineered panel into a fatigue crack waiting for enough highway miles to open it up. Rigid bolting at mounting points creates repeated microstrain at the resin interface, and good engineering practice specifies isolated mounts and local reinforcement precisely to prevent this.
Before you or your installer touch a wrench to a new part, run this checklist:
- Confirm every mounting point uses an isolating bushing or grommet, not a hard metal-to-carbon contact.
- Torque to the manufacturer’s specified value, not “snug plus a quarter turn.”
- Verify the adhesive is rated for automotive temperature and flex cycling, not a generic panel bond.
- Check that any load-bearing bolt hole has a backing plate or insert, especially on splitters and diffusers.
And before you buy, put these questions to the vendor directly: What resin system did you use, and is it epoxy or a lower-cost polyester or vinyl ester? What cure method, autoclave or vacuum bag at room temperature? What’s the fiber content by volume? Is there a warranty, and does it cover structural failure or just cosmetic defects? Can you provide a test certificate?
Pro Tip: If a vendor won’t answer the resin question specifically, walk away. Epoxy resin systems dominate structural automotive parts because of their adhesion and toughness, while polyester and vinyl ester are cheaper but noticeably worse at resisting moisture and UV over time.
How Heat, Moisture, and UV Quietly Weaken the Resin Matrix
Structural failure isn’t always about a bad cure day at the factory. Time and weather do plenty of damage on their own, and this is where the impact of speed on carbon fiber compounds with years of ordinary ownership. A part that passed every inspection when new can be structurally compromised three summers later, simply from sitting outside.
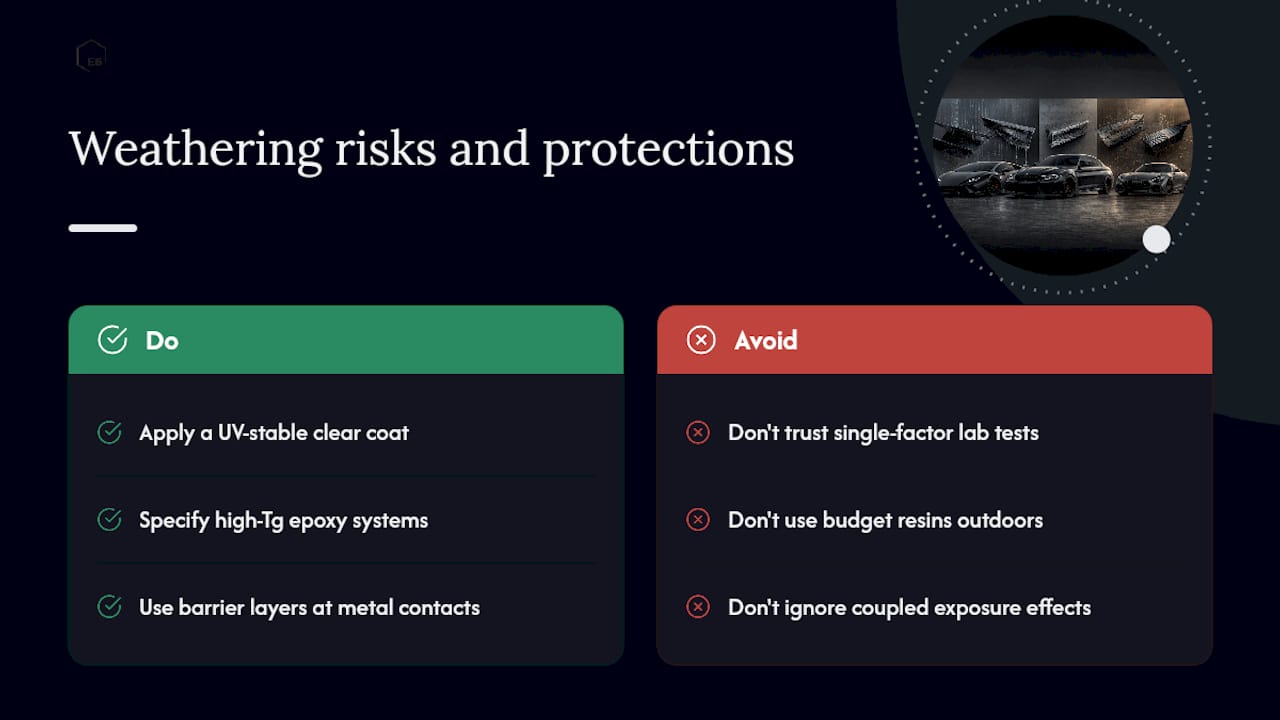
UV radiation attacks the resin matrix directly, breaking down polymer chains at the surface and causing the chalking and micro-cracking that eventually show up as a dull, faded finish. Moisture is worse, because it doesn’t stay on the surface. Water molecules diffuse into the resin over months and years, a process materials engineers call hygrothermal exposure, and that moisture plasticizes the resin, effectively softening it from the inside and lowering its glass transition temperature (Tg), the point at which resin shifts from rigid to soft.
The numbers here are worth taking seriously. Accelerated hygrothermal testing on aerospace-grade carbon epoxy laminates found up to a 35 percent loss in compressive strength when moisture-conditioned samples were tested at 80°C, with even steeper losses as temperatures approach or exceed the resin’s Tg. That’s not a cosmetic issue. Compressive strength is exactly what a splitter or diffuser needs most under downforce loading at speed.
None of these stressors work in isolation on a real car sitting in a driveway or a parking garage. Moisture, freeze-thaw cycling, UV, and heat act together, and coupled exposure produces damage that single-factor lab tests routinely underestimate. That’s a meaningful gap between how a cheap part gets rated on a spec sheet and how it actually behaves after two winters and two summers outdoors.
There’s also a chemistry angle buyers rarely consider: mixed-material assemblies. Carbon fiber panels bolted near aluminum or steel components can set up galvanic corrosion at the contact point if there’s no proper barrier layer, which slowly attacks the surrounding resin and fasteners. High-Tg epoxy systems with proper surface pre-treatment resist this far better than budget resins.
Pro Tip: A UV-stable clear coat isn’t optional cosmetics, it’s a structural safeguard. E6 Carbon’s breakdown of why cheap carbon fiber turns yellow explains which resin and coating combinations actually hold up outdoors.
How to Spot Early Signs of Delamination Before It Fails
You don’t need a materials lab to catch most problems before they become dangerous. A disciplined inspection routine, done at home and reinforced periodically by a shop, catches the majority of high-speed carbon fiber reliability issues before they turn into a component departing your car at speed.
Start with these steps, in order:
- Visual edge inspection. Run your eyes and fingers along every panel edge and mounting point looking for hairline cracks, discoloration, or a whitish “frosted” appearance in the resin, all early delamination signs.
- Tap test. Lightly tap the surface with a coin or plastic tool across the whole panel. A solid, consistent tone means good bonding; a dull or hollow sound in one spot usually means a void or delamination underneath.
- Flex test under controlled load. Apply gentle, even hand pressure to unsupported sections and watch for uneven flex, creaking, or any give that feels different from an identical area nearby.
- Fitment verification. Check that every mounting point still sits flush and that no gap has opened up since installation, since a shifted panel often signals a failing bond or a cracked backing point.
For anything ambiguous the tap test turns up, a shop has better tools available:
- Ultrasonic inspection finds subsurface voids and delaminations with good precision; budget for a moderate shop fee per panel.
- Infrared thermography spots temperature anomalies tied to internal defects, useful for quick full-panel scans.
- X-ray or CT scanning gives the clearest picture of internal structure but usually only makes sense for high-value or safety-critical components given the cost.
Call a specialist any time results are inconclusive, if you suspect the bond at a mounting point has failed, or if you spot micro-cracks radiating from a load path. Guessing is not a strategy at 130 mph.
Repair, Replace, or Monitor: Realistic Lifespan Expectations
Not every flaw means the part is done. Minor cosmetic scuffing on the clear coat, with no crack propagation into the structural plies underneath, can often be sanded, refinished, and monitored going forward. That’s a legitimate, low-risk repair.
Structural damage is a different conversation entirely. Genuine lamination repair, the kind that restores real strength rather than just appearance, requires vacuum bagging or autoclave re-curing and a technician who understands ply orientation and resin compatibility. DIY fiberglass-resin patch jobs from a hardware store kit do not restore structural integrity, no matter how good they look once sanded and painted.
Minor surface damage with no crack into the structural layers: monitor and consider a cosmetic repair. Any suspected damage near a mounting point, or a visible crack that runs into the load-bearing plies: replace the part. There is no safe middle ground once a structural crack is confirmed.
On lifespan, expect a real gap between budget wet-layup parts and engineered ones. Wet-layup components with unspecified resin often show visible degradation within 3 to 5 years outdoors, and that timeline shortens further in hot, sunny climates or with regular high-speed use. Properly engineered, autoclave-cured components with documented fiber volume fraction and tested cure cycles are built for a substantially longer service life under the same conditions.
Before buying, insist on documentation: cure cycle records, a mechanical test report covering tensile and interlaminar shear strength, the stated fiber volume fraction, and an explicit statement of speed suitability. If a vendor can’t produce any of it, price accordingly.
The E6 Carbon Approach to Solving High-Speed Failure
E6 Carbon builds every component around the failure modes described above, not around cosmetic weave appearance. That distinction drives every step of the process.
- Prepreg material selection. Every panel starts as pre-impregnated carbon fiber with a controlled resin content, eliminating the batch-to-batch inconsistency that plagues wet-layup shops.
- Autoclave cure. Heat and pressure applied simultaneously consolidate the laminate, driving void content down and fiber volume fraction into a tight, repeatable range.
- Vacuum consolidation and QA. Every cure cycle is logged, and void metrics and fiber volume fraction records are kept as standard documentation, not an upsell.
- Fitment-first engineering. Mounting points, backing reinforcement, and hardware are engineered for the specific platform before the part ever reaches a customer’s car.
Validation testing covers fatigue behavior under cyclic loading, tensile strength, interlaminar shear strength, and physical fitment checks against test fixtures built around Mercedes-AMG and Lexus LC500 platforms, with McLaren and Lamborghini programs expanding on the same methodology.
The gap between a wet-layup panel and an autoclave-cured one isn’t cosmetic. It’s the difference between a part engineered to survive 150 mph aero loads for years and one that’s a matter of when, not if, it delaminates.
For platform-specific guidance, E6 Carbon’s Lexus LC500 dry versus wet carbon fiber guide breaks down exactly what to look for on that chassis.
What the Industry Won’t Tell You About “Carbon Fiber” Labeling
The dirtiest secret in this category is that “carbon fiber” on a listing tells you almost nothing about structural quality. A dry-looking 2×2 twill weave on the surface is frequently just a cosmetic outer layer bonded over a fiberglass or low-grade carbon backing, a substitution that’s invisible until the part is cut open or fails. Buyers get sold on weave pattern and gloss when the variable that actually determines survival at speed, resin system and cure method, goes completely unmentioned.
The conventional advice, “just buy carbon fiber instead of plastic,” misses the point entirely. A poorly made carbon panel can be less safe than a well-designed OEM plastic component, because the plastic at least deforms predictably instead of releasing a fragment at highway speed. What matters isn’t the material category. It’s whether the manufacturer controls void content, documents fiber volume fraction, and specifies a resin system suited to real-world heat and UV exposure.
If you take one thing from this, prioritize documentation over appearance. A part with a boring, unglamorous cure record beats a gorgeous weave with no paperwork behind it, every time.
Get Engineered Aerodynamic Parts Built for Real Speed, Not Just Looks
Wet layup shops and no-name overseas sellers can get you a carbon fiber front lip or diffuser fast and cheap, but you’ve just read exactly what that shortcut costs in void content, fiber consistency, and long-term structural margin. E6 Carbon takes the opposite approach: every aerodynamic component is autoclave-cured from prepreg material with documented fiber volume fraction and cure records, engineered specifically for the platform it’s built for rather than trimmed to fit.
That fitment-first process is why E6 Carbon components are validated on test fixtures built around Mercedes-AMG, Lexus LC500, and expanding McLaren and Lamborghini programs, the exact platforms where a loose-fitting cosmetic panel turns into a real liability at speed. If you’re evaluating a front lip, diffuser, or hood for a track-driven or high-speed street car, start by reviewing the full engineering breakdown of premium carbon fiber components and browse the current catalog to find the right fitment for your platform.
Sources
- Carbon-fiber reinforced polymer review (materials, interfaces and degradation mechanisms)
- Review of degradation mechanisms and testing approaches for pultruded carbon fibre composites
FAQ
What ruins carbon fiber over time?
UV radiation and moisture ingress ruin carbon fiber parts over time by breaking down the resin matrix, causing chalking, plasticization, and a loss of compressive strength that can reach 35 percent under accelerated conditioning. Poor manufacturing, especially voids from wet layup, accelerates this degradation.
How long does a carbon fiber part actually last?
Budget wet-layup parts with unspecified resin often show visible degradation within 3 to 5 years outdoors, while properly documented, autoclave-cured components like those from E6 Carbon are engineered for a substantially longer structural service life under the same exposure.
Can carbon fiber break easily?
Carbon fiber composites are brittle rather than ductile, so they can fail suddenly once a defect like a void or delamination reaches critical size, without the bending or warning you’d get from metal. Small impacts that leave barely visible damage can seed cracks that propagate under vibration and speed.
Why is carbon fiber hard to repair?
Genuine structural repair requires vacuum bagging or autoclave re-curing to restore real strength, along with matching resin chemistry and fiber orientation, which DIY patch kits cannot replicate. Cosmetic sanding and repainting can hide surface damage without addressing cracks in the load-bearing plies underneath.